Google+ talkinginallcaps@gmail.com
  • Skip to primary navigation
  • Skip to main content
  • Skip to primary sidebar
  • Skip to footer

Talking in ALL CAPS

  • Food
    • 52 Salads Recipe Index
    • 52 Soups Recipe Index
  • Photography
  • Travel
    • Travel
    • US National Parks
    • Washington DC
    • Disneyland
  • Thoughts
    • Thoughts
    • Motherhood
    • Parenting
  • Calgary
  • About Me

photography

Get Those Photos Off Your Computer and On Your Wall With Ookpix

November 18, 2014 by danawyyc 2 Comments

If there is one thing my family shares it is a love of photography. Even my two year old will ask me to “take a picture me?” But even though we take reams of pictures, it can be hard to get them off the computer and into the real world.

When Ookpix offered to let me do  review of their photo art services I jumped at the chance.

Ookpix is a Canadian computer (located right here in Calgary!) that is focused on helping you turn your family’s photos into works of art. They do wall art, home decor, calendars and photo books.

Ookpix wall art

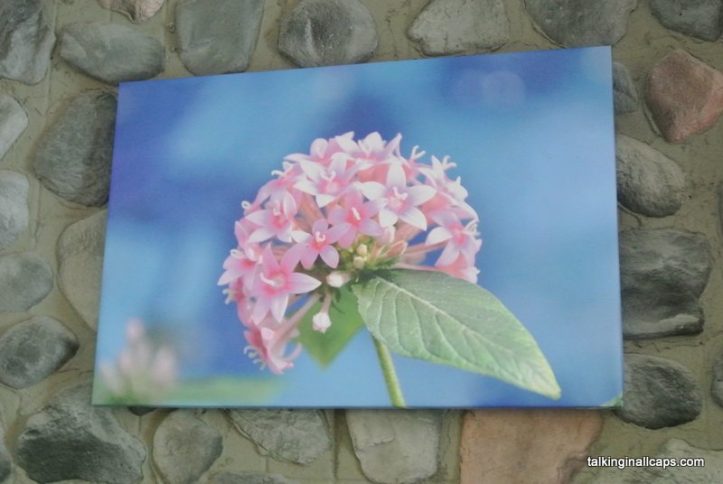
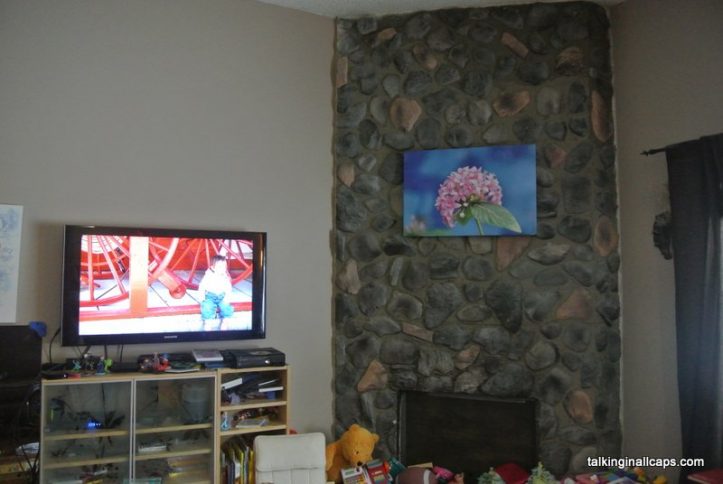
I had a really hard time deciding which picture to use. I thought about using a photo of the kids but we have another little one on the way and it seemed kind of mean to have a big print with only two of our kids in it. In the end I ended up choosing a photo of a flower that we took in the Botanical Gardens in Washington, DC. There’s a lot of flower pictures out there, but there is something special about having the artwork in your house be uniquely yours.

Ookpix wall art

In the end, choosing which photo to use was the most time consuming part of the whole process. Ordering the canvas was quick and easy. Ordering from a Canadian company was a definite bonus as not only do they have free shipping, but the print arrived in just a few days and I didn’t have to worry about any extra charges at the border.

I was really impressed with the clarity of the print when it arrived, I thought it might be kind of grainy but the detail is fantastic. We’re already planning what photo we’re going to get done next.

ookie_computer

Want to order your own wall art, home decor, photobook or calendar from Ookpix (http://ookpix.com)? They have kindly supplied me with a coupon code for me to share with my followers – TALKINGINALLCAPS – good for 55% off at ookpix.com starting today until Dec. 1. Get some of your Christmas shopping done without leaving the house! If you’re shopping for Christmas, it’s good to know that ookpix offers an ‘under the tree guarantee.’ All orders placed by December 12 will be delivered by December 24.ookie_gift


Filed Under: giveaway, photography

Photos with Santa: Learning from other people’s mistakes

November 19, 2013 by danawyyc 11 Comments

Photos with Santa: Learning from other people's mistakes

Even though my oldest is only 4, I have quite a bit of experience taking small kids to see Santa. Partly for my blog post where I talk about what it’s like to take photos with Santa at different  malls in Calgary and partly because I think it is just plain fun. My friends and family have kindly supplied me with some photos to round out my own to help you get better photos with Santa this year.

1. Prepare Your Kids Ahead of Time

Read your kids stories about Santa, show them movies with Santa (if you can find one with their favorite character, even better) and show your kids pictures of them or other family members with Santa to familiarize them.

566336_10151312554677040_337526886_n

Unless the photos looked like this

Unless the photos looked like this.

It can also be worthwhile to seek out a Santa that is more natural looking and inline with their expectations.

603961_372686899487334_671224799_n

If you wouldn’t sit on that lap, why would you put your child on it?

Screenshot 2013-11-18 at 3.30.27 PM

This skinny Santa is not going over well

2. Dress for the Occasion

Even if you’re going to get a free photo, consider what your kids are wearing.

131559_112148458855831_5035859_o

Cute shirt, but not for this photo

IMG_0080

This may be going a little too far

S S

At the very least take off your kids coats!

You may also want to consider what you’re wearing that day… just in case.

image_1354210759337049

If you look closely, you can see Santa at the back

3. Use a Partner

Especially if you are taking the photos yourself, bring someone with you so they can help you position and distract the kids to help keep them from freaking out.

Crying with Santa

Freaking out

4. Try Backing In

If you have a really little kid, try holding them facing you and backing them into Santa, keeping their attention on you. Then back away and quickly take the picture.

gordie with santa0001[2]

Sometimes this works

Lola- Eff you Santa! 2011

Sometimes not so much

5. Time it Right

Arrive a bit early so your kids can see Santa from a distance before it’s their turn. Make sure they are not tired or hungry. Bring a snack just in case. Weekday mornings and evenings are usually quieter time to visit. Whatever you do, don’t go when your child would normally be napping.

Screenshot 2013-11-06 at 3.14.37 PM

Not a good time

6. Give Them Some Moral Support

Having a friend, sibling or even a favorite toy may be all your kid needs to feel comfortable and stay focused.

396652_10151165250754639_428035946_n

Worked like a charm

7. Be Flexible

You may be able to get a better picture by not trying to force a smile.

gordie and santa 20100001[2]

That’s a pretty cute pout

You may also want to consider letting your kids stand beside Santa instead of on his lap.

53308_10150347928425173_5766155_o

Santa may be holding him back, but they are all in the picture.

8. Make use of Some Photography Tips

If you are taking the photo yourself, try setting the white balance to match the lighting (florescent or incandescent bulbs). Or you can adjust that on your computer afterwards.

baby Dana and santa

Was 1982 really this yellow?

If the room isn’t very bright, bump up the ISO and hold the camera steady (close to your body, try to kneel or set the camera on something to use as a makeshift tripod). Also double check that your camera is focusing on your child instead of the background.

photo (53)

That tree looks great!

santafamily

Holding the camera horizontal can also be a good strategy

Position yourself so you can see your child’s face even if they are not looking directly at you.

newspaper santa

Candid shots often show your child at their best.

Don’t forget to take multiple pictures.

blink santa

So this isn’t the only photo you go home with.

263686_10152291199235562_575835129_n

He looks cutely unsure in this picture instead of full on bawling

9. Try Again

If your child is hesitant to see Santa the first time, don’t be afraid to go back (again) later in the day or on another day all together.

DSC_0827

The first try

DSC_0837

Again after lunch.

10. If All Else Fails…

You can always take a family photo near Santa instead. Most malls have a Christmas display that would make a great backdrop.

704653_10152311427910173_1395289379_o

This is the best ‘Santa’ photo this family has taken.

tree at home

Or you can even use your tree at home

Or you could just take a picture of Santa!

just santa

Even if Santa looks a little confused.

11. Laugh it Off

Sometimes, even if you end up with a picture that wasn’t what you wanted, it can still end up being a treasured part of your family history.

67889_10152287758050397_782823760_n

That year’s Christmas card

As funny as some of these photos are, I hope this post helps your family get great photos with Santa this year. And if your pictures don’t go as planned you can always send them to me for next year’s post.

Have a Merry Christmas!


What are your tips for taking better photos with Santa?

If you have a not-so-good photo with Santa you’d like to share, you can e-mail it to talkinginallcaps@gmail.com.

Are you from Calgary? Check out my website about the best indoor and outdoor places to take your kids –> http://www.calgaryplaygroundreview.com

All Photos used with permission

Filed Under: photography Tagged With: humor, Santa

How to Take Photos of Kids in Front of the Christmas Tree

December 20, 2012 by danawyyc 5 Comments

Taking great pictures of your kids by the Christmas tree can be challenging. This week I tried to figure out how to take better pictures of my kids in front of our Christmas tree. I’ve put together some tips and things to try to get the kind of photos you want.

1. Turn off Your Camera’s Flash

No matter what kind of camera you have, and what your lighting conditions are, nothing will take the magic out of your Christmas tree photos more than using your camera’s built in flash.


kids and Christmas Trees

Christmas - Pre - 2012

2. Pay attention to the Background and Foreground of your Photo

No matter how good your photo is, it’s still going to look like crap if there’s a bunch of junk cluttering it up. (Like in the photo above…)

Clear a Path
At least clear a path.

3. Practice First With a Doll or Stuffed Animal

Stuffed animals are much more patient subjects than children. Be sure that you have an idea of what you want to do before you involve your kids. You’re probably still going to have to make some adjustments. Kids move around a lot more than inanimate objects so you may have to increase your ISO and reduce your shutter speed (more on that on point 10) but at least you’ll have a starting point.

more christmas pics
You’re going to have a limited timeframe so you might as well make them count.

4. Keep Your Camera Steady

Unless your room is really well lit, you’re probably going to be dealing with a lower light setting. To get a good exposure you’re likely going to have to use longer shutter speeds (so your camera takes a longer time to take the picture) This is going to make it important to keep your camera steady so that you’re not getting movement from camera shake. If you do capture any movement, it’s better for it to be because your kid is moving not you.

If you have one, you can use a tripod, but you can also use the ground, a stack of books, a table etc. You may also want to consider a remote for your camera (surprisingly affordable) or the timer on your camera (probably only useful if you can get your kids to stay still-ish).
Keep Camera Steady
I’m pretty sure that tree is not actually moving.

5. Shoot Low to the Ground

If you have small kids you may even want to lie on the ground to get a better angle.
more christmas pics3

6. Put Your Kid a Few Feet in Front of the Tree

It’s natural to want to put your kid right in front of the tree but you’ll typically have better shots if you move them a few feet away. You’ll be able to see more of the lights on your tree and you’ll be able to manipulate the aperture to blur the background if you want to.
more christmas pics2

7. Stand Back and Zoom in

Another good strategy is to also increase the distance between you and your child. If you’re farther away, you’ll be able to zoom in which will blur the background which is great for portraits and give the Christmas lights a pretty look.

Christmas - Pre - 20121

8. Use Something to Help Keep your Kid From Moving Around

This is important for two reasons – 1. to keep the tree in the background and 2. to reduce motion blur. For older kids, bribery can be a good tactic,, younger kids may benefit from a mark on the floor for where you want them to be. For babies, your best best is going to be an unfamiliar object that you don’t mind being in your shots.

use something to keep still
This tree was the perfect distraction.

9. Try to Light up Your Kid’s Face

Depending on the lighting in your house and how much your kids move around, you may want more light to get a good shot. One thing you can try is getting some natural light on your kids face. I tried this below, but my tree is too big for me to move around and my window is right beside the tree making it difficult to get the tree in the background and the sunlight on my child’s face.
more christmas pics1-001
natural light
This does give a interesting look.

The other option, and the one that will give you the most consistent success, is to use an external flash with the flash pointed at a wall or ceiling. This will light up your child without taking away the beauty of your tree.

With Flash
Taken with external flash pointed at the wall.

10. Pick Your Camera Settings

Using the above strategies, you may be able to get great pictures just putting your camera on the no flash setting.

If you have a DSLR and want to play around here’s what I found helpful:

  1. Set your camera to Shutter priority. This will let you manipulate how long light is allowed to hit the sensor. A longer shutter speed will tend to make your christmas lights look prettier but it will also capture more movement from your kids.
  2. Set your ISO and shutter speed. You want as low an ISO as you can get away with and the longest shutter speed.
  3. You’ll probably want to start with an ISO of at least 400 and may need to bump it up to upwards of 1600 if your kid is moving around a lot.
  4. Start with a shutter speed of about 1/2 a second. If you’re getting good pictures try lengthening the shutter speed, if you are getting blurry pictures decrease it.
  5. Play around with the ISO and shutter speed settings. Increasing the ISO will allow you to use a longer exposure (longer shutter speed). (For more depth on how these are inter-related you can see my post on How to choose what professional mode to use).

DSC_0079
It’s not the sharpest image but at least she’s not blurry. Here I had to bump up the ISO to 1600 to get a good image.

A few more of my favorite shots:
DSC_0071

stand back and zoom in

flash

DSC_0115-001
Not what I was trying to do, but kind of interesting.


Note: Aside from cropping the above images were not digitally manipulated.

Sources used for this article:

http://www.augustteaphotography.com/taking-pictures-of-your-christmas-tree/

http://www.sarahcblog.com/2011/11/how-to-photograph-kids-in-front-of-the-christmas-tree/

http://faithfulstepsphotography.blogspot.ca/2011/12/photographing-kids-in-in-front-of.html

http://ashleyannphotography.com/blog/2008/12/04/photo-tip-christmas-tree-pics/

Filed Under: photography Tagged With: Christmas, tutorial

How to Take Better Photos With Santa (and How Not to)

December 1, 2012 by danawyyc 8 Comments

bettersantaphotos-001

Even though my oldest is only 3, I have quite a bit of experience taking small kids to see Santa. Partly for my blog post where I talk about what it’s like to take photos with Santa at different  malls in Calgary and partly because I think it is just plain fun. My friends and family have kindly supplied me with some photos to round out my own to help you get better photos with Santa this year.

1. Prepare Your Kids Ahead of Time

Read your kids stories about Santa, show them movies with Santa (if you can find one with their favorite character, even better) and show your kids pictures of them or other family members with Santa to familiarize them.

566336_10151312554677040_337526886_nUnless the photos looked like this.

It can also be worthwhile to seek out a Santa that is more natural looking and inline with their expectations.

603961_372686899487334_671224799_nIf you wouldn’t sit on that lap, why would you put your child on it?

2. Dress for the Occasion

Even if you’re going to get a free photo, consider what your kids are wearing.

131559_112148458855831_5035859_oThis shirt of Gordie’s is really cute, but doesn’t look great in a Christmas photo.

IMG_0080
This may be going a little too far.

S S At the very least, take off your kids’ coats!

You may also want to consider what you’re wearing that day… just in case.

image_1354210759337049If you look closely you can see Santa at the back.

3. Use a Partner

Especially if you are taking the photos yourself, bring someone with you so they can help you position and distract the kids to help keep them from freaking out.

Crying with SantaFreaking out.

4. Try Backing In

If you have a really little kid, try holding them facing you and backing them into Santa, keeping their attention on you. Then back away and quickly take the picture.

gordie with santa0001[2]Sometimes this works.

Lola- Eff you Santa! 2011
Sometimes, not so much

5. Time it Right

Arrive a bit early so your kids can see Santa from a distance before it’s their turn. Make sure they are not tired or hungry. Bring a snack just in case. Weekday mornings and evenings are usually quieter time to visit. Whatever you do, don’t go when your child would normally be napping.

DSC_0074
Not a good time.

6. Give Them Some Moral Support

Having a friend, sibling or even a favorite toy may be all your kid needs to feel comfortable and stay focused.

396652_10151165250754639_428035946_nWorked like a charm.

7. Be Flexible

You may be able to get a better picture by not trying to force a smile.

gordie and santa 20100001[2]That’s a pretty cute pout.

You may also want to consider letting your kids stand beside Santa instead of on his lap.

53308_10150347928425173_5766155_oSanta may be holding him back, but they are all in the picture.

8. Make use of Some Photography Tips

If you are taking the photo yourself, try setting the white balance to match the lighting (florescent or incandescent bulbs). Or you can adjust that on your computer afterwards.

baby Dana and santaWas 1982 really this yellow?

If the room isn’t very bright, bump up the ISO and hold the camera steady (close to your body, try to kneel or set the camera on something to use as a makeshift tripod). Also double check that your camera is focusing on your child instead of the background.

photo (53)That tree looks great!

Position yourself so you can see your child’s face even if they are not looking directly at you.

newspaper santaCandid shots often show your child at their best.

Don’t forget to take multiple pictures.

blink santa
So this isn’t the only photo you go home with.

9. Try Again

If your child is hesitant to see Santa the first time, don’t be afraid to go back (again) later in the day or on another day all together.

DSC_0827
The first try.

DSC_0837
Again after lunch.

10. If All Else Fails…

You can always take a family photo near Santa instead. Most malls have a Christmas display that would make a great backdrop.

704653_10152311427910173_1395289379_oThis is the best ‘Santa’ photo this family has taken.

Or you could just take a picture of Santa!

just santaEven if Santa looks a little confused.

11. Laugh it Off

Sometimes, even if you end up with a picture that wasn’t what you wanted, it can still end up being a treasured part of your family history.

67889_10152287758050397_782823760_nThat year’s Christmas card

As funny as some of these photos are, I hope this post helps your family get great photos with Santa this year. And if your pictures don’t go as planned you can always send them to me for next year’s post.

Have a Merry Christmas!

Dana Wheatley

What are your tips for taking better photos with Santa?

If you have a not-so-good photo with Santa you’d like to share, you can e-mail it to talkinginallcaps@gmail.com.

Are you from Calgary? Check out my website about the best indoor and outdoor places to take your kids –> http://www.calgaryplaygroundreview.com

Photos used with permission

Filed Under: photography Tagged With: Christmas, Santa

Professional Camera Modes: How to Decide Which Professional Exposure Mode to Use

November 27, 2012 by danawyyc 3 Comments

Learning to Use my DSLR – Practical Photography Tutorials

When I wrote my first photography post on taking better pictures of your kids in the snow, I realized that I didn’t know how to choose which professional mode to use. This seems to be a pretty fundamental gap in knowledge so I decided I should figure it out.

It became clear pretty quickly that understanding what exposure is would be a good first step. I won’t go into a lot of detail – hopefully just enough.

Put simply, exposure is how much light is falling on your camera’s image sensor (in the past it would be how much light fell on your film). To get a clear, crisp image you don’t want too much light (overexposed) or too little light (underexposed) landing on your sensor.

Three related factors impact what your exposure will be: ISO, Aperture and Shutter Speed. To get a good exposure these three factors have to be balanced correctly and making changes to one will necessitate making changes to one or both of the other factors.

ISO – This is how sensitive your camera’s sensor is to light. With film cameras, you had different film ‘speeds’ that you had to change if you wanted a different level of sensitivity. For digital cameras you can change the ISO just by manipulating your camera’s settings. The higher the ISO number, the more sensitive your sensor will be to light. This means you don’t need as much light for a good exposure but the image quality is reduced when your sensor is more sensitive.

Eg.
If you are outside on a sunny day, you may want your ISO to be as low as 100.
If you are inside you may want your ISO to be 400 (more sensitive due to less ambient light).
If you are taking a low light photograph you may need to set your ISO to a very high number. (your image will be more grainy but at least you can get the shot).

In general, you want to set your ISO to the lowest number you can to get the best image quality but to get a good exposure, you need to increase the ISO in lower light settings.
DSC_0126

By bumping up the ISO to 1600, I was able to get this photo of Nicole is a very dark room.

DSC_0126-001

When you zoom in on the picture you can see the trade off of using the high ISO – although the exposure is pretty good, there is more noise resulting in image that is grainy.

Aperture (or f-stop) – this is how much light passes through your lens at once. A larger aperture will result in more light passing through and a smaller aperture will result in less light passing through. Manipulating the aperture also effects the depth of field (how much of your image is in focus).

Eg.
To get a good exposure outside on a sunny day, you would need a narrower aperture such as f/22.
To get a good exposure in a low light setting you may need an aperture such as f/4.

2012-11-29

In these pictures I manipulated the aperture. You can see how it also changed the depth of field. In the photo on the right the background is quite blurry and the focus is just on Gordie. In the photo on the right the background is more in focus and pretty distracting.

Shutter Speed – This is how long light is allowed to hit the sensor. The shorter your shutter speed, the less light will hit the sensor. The longer the shutter speed the more motion you will capture as well.

Eg.
On a sunny day you may want a short shutter speed of 1/4000.
In a low light setting you may want to capture light for a longer period of time using a shutter speed of 1/60.

DSC_0465

Here’s an example of a long shutter speed with a moving subject. Although in this instance it was not what I had intended, it can be an interesting effect. Kids move so fast it can be helpful to shorten the shutter speed to help photograph them without motion blur.

These three factors are inter-related, so when you change one you may need to change one or more of the others to get a good exposure. For non-professional photographers like myself (and I’m assuming you if you’re reading this) it can be helpful to let your camera make some of the decisions while you manipulate the one you are most interested in. Picking the right professional exposure mode can help you do this.

P – Program Mode:

This mode would be perfect if you want to make some manipulations but have your camera do most of the heavy lifting. In this mode you can change things like the white balance, exposure compensation, ISO, and metering. This would have been perfect for me to use for my post on taking better pictures of your kids in the snow (I used the Aperture Priority Mode instead). I wasn’t trying to change the aperture or shutter speed. This can also be a helpful mode if you are going to be taking photos in a variety of lighting conditions.

SnowPicCollage

In these pictures I was only manipulating the exposure compensation, to brighten up the snow. That would be a great use of Program Mode.

A – Aperture Priority Mode

In this mode, you manipulate your camera’s aperture while your camera handles the rest of the exposure settings. This will allow you to change the depth of field or how much of your photo is in focus. This is particularly great for photographs so your subject is in focus but the background is blurred. You can also use it to make sure that everything in your shot is in focus. You would likely want this mode while photographing landscapes, portraits, architecture, close up photography (think food or flowers) and wildlife.

S – Shutter Priority Mode

This mode is similar to Aperture Priority mode but in this case, you manipulate the shutter speed while your camera handles the rest of the exposure settings. This mode is best to use when your subject is in motion. You can use it freeze the action by setting it to be quick or to show motion by leaving it longer. You would probably want to use this mode if movement was a big aspect of your subject or the photo effect you want. This can also be highly useful for photographing kids!

M – Manual Mode

In this mode, you have the most control, but it’s also the hardest to use. At this stage of my photography I don’t want to use this mode and if you’re reading this I’m assuming you don’t either!

A Word About Scene Modes

Your camera will probably also have a number of pre-set Scene modes. There’s absolutely nothing wrong with trying them out too. Those modes use all the same principles I discussed above – pre-selected to try to create the best exposure for that kind of setting. Eg. the night mode will use a wide aperture to let in a lot of light at once and a longer shutter time, the action mode will use a quick shutter speed. There’s nothing those pre-sets can do that you shouldn’t be able to do yourself.

Learn Along Assignments:

1. Experiment with ISO

  1. Take your camera into a setting with not much light.
  2. Put it into Program Mode
  3. Set your ISO to a really high setting (like 1600)
  4. Try taking a picture. (Make sure you are keeping your camera steady)
  5. Now set your ISO to a lower number (like 400).
  6. Compare your results

2. Experiment with Shutter Speed

  1. Pick an subject that is moving. (Like your kids!)
  2. Put your camera into Shutter Priority Mode
  3. Try taking pictures at different shutter speeds
  4. Compare your results

3. Experiment with Aperture

Note: this is the hardest one to play around with. My camera will let me set my aperture to settings that don’t work well with my lens. I will be doing a tutorial on using the aperture setting in the near future.

If you would like to play around with it before that here’s what I recommend:

  1. Set your camera to Aperture Mode.
  2. Somewhere on your lens it will say something like 1:3.5-5.6G. Start by setting your aperture to within these numbers to start.
  3. Select an subject that is in front of a busy background. Making sure there is some distance between your subject and the background will make it easier to see the effect.
  4. Take photos with different aperture settings.
  5. Compare your results

4. Let me know how it went!


Resources Used for this article:

http://digital-photography-school.com/iso-settings

Nikon D3200 From Snapshots to Great Shots by Rob Sylvanc

Filed Under: photography

Taking Better Indoor Pictures–Positioning Your Subject

November 13, 2012 by danawyyc Leave a Comment

Learning to Use my DSLR – Practical Photography Tutorials

Collage Positioning

Despite the snow and cold weather, the sun was strong, so I thought I’d take a look at one of the things you can do to improve your indoor pictures. One of the most fundamental aspects of photography is lighting. Although you can get some interesting effects by taking your photograph into the light, typically you want to yourself with the strongest light source behind you and your subject facing the light. This applies to any kind of camera, not just DSLRs.

Taking advantage of some natural lighting can make your photos much better without having to make any adjustments to your camera. However, if you try to take a picture of your kids right under a bright window the resulting photograph is less than awesome.

DSC_0033

Sometimes positioning the light behind one shoulder can be really pretty.

DSC_0039

But I found today that the light was just just too bright. So I moved Gordie so he was facing the window.

DSC_0043

Without using any kind of flash, he’s well lit and the colors are great.

Here’s another example with Nicole in the center of the room. This time she stayed in the same spot and only I moved.

Bad picture with the window behind her:

DSC_0057

Even worse picture with the window behind her:

DSC_0061

Much better picture with the window behind me:

DSC_0073

It can also be important to think about what your subject is wearing. Nicole looks adorable wearing this little white dress but it provides an extra challenge when taking her picture.

When she’s in front of the window it doesn’t make much of a difference:

DSC_0019

But with her close to the window and the light behind my shoulder, the dress is a little bright.

DSC_0021

If I set her back a few more feet from the window the photograph looked a lot better even though the light was still over my shoulder.

DSC_0031

Just to demonstrate that this principle holds true for other cameras as well, here’s a couple I took with my iphone:

photo (51) photo (52)

Showing off my new skills:

DSC_0064
DSC_0070

Filed Under: photography

Taking Pictures of Kids in the Snow–Photo Tips

October 26, 2012 by danawyyc 3 Comments

Learning to Use my DSLR – Practical Photography Tutorials

Equipment Used in this Tutorial: Nikon D90, 18-105mm Lens

I had intended on doing my first tutorial on positioning yourself, your light source and your subject but instead it snowed a ton and was overcast. So instead, I decided I’ll try to figure out some tricks to improve my snow photographs. Which should come in super useful considering it is only the end of October.

After looking around, I found a three of suggestions that I thought I would try out: manipulating the exposure bias, white balance and the metering mode. The idea is that these will in turn make the snow less grey, make your photo less blue and make your camera more accurate when balancing the light by focusing on the subject rather than the whole scene.

The first thing that I had to do was set my camera to a programmable setting. On my Nikon D90 at least I can’t change the exposure bias on the auto setting.

Here’s a shot taken with the Auto setting:

Auto
Auto Setting

One of my Nikon photography books suggests that the Aperture Priority setting (shown on the camera below) would be appropriate if the scene is well lit which is was, so that’s what I used. Here’s one taken with the Aperture Priority setting before I changed any dials.
Aperature Priority
Aperture Priority Setting

I think the photo taken on the automatic setting looks a little better than the one taken with the Aperture Priority Setting but I was hoping to figure out how to improve upon that.

Exposure Bias: Making your snow look less grey

One of the difficulties with photographing snow, is that because everything is so white, your camera will try to balance this out by making the snow look grey. When you manipulate the exposure bias, you are either overexposing or underexposing your photos. For snow you want to over expose your photos a little bit by adjusting it to something like +1.

I tried this out in the photos below:

Aperature Priority Exposure -1
Exposure Bias 0                                        Exposure Bias -1

Exposure +1 Exposure Bias +2
Exposure Bias +1                                      Exposure Bias +2

I swear these are all separate photos. Nicole was a little surly about being outside in the snow. She has not found it to be very much fun so far. The first time we were out she tried to army crawl and got a face full of snow. She was not impressed.

Anyway, you can see the snow in the +1 exposure bias setting looks a lot whiter than the 0 or –1 setting. Even the +2 setting looks pretty good. You lose a lot of the definition in the snow but it makes for a striking photograph.

Here’s a couple more examples of manipulating the exposure bias:
0 Cloudy
Exposure Bias 0

1, Cloudy
Exposure Bias +1

0 Cloudy  1 Cloudy
Exposure Bias 0                                       Exposure Bias +1

I thought this change made a definite improvement in my photos. I would recommend giving it a try for sure.

White Balance – Making the snow look less blue

The second suggestion I decided to try was manipulating the white balance. Snow photos tend to have a blueish tinge and so either a flash or cloud setting was recommended to even that out. (Not that you want yellowy snow, just less blue).

In the first 3 photos below you can see what happened when I manipulated the white balance setting. In the last setting I compared them to one where I manipulated the exposure bias like I did above.

Aperature Priority Exposure Bias 0, White Balance Flash
Exposure Bias 0, White balance auto         Exposure Bias 0, White balance flash

Exposure Bias 0, White Balance Cloudy Exposure Bias 1, White Balance Auto
Exposure Bias 0, White balance cloudy       Exposure Bias +1 White balance auto

Although I can see differences between the white balance settings, I have a hard time picking out a winner. Manipulating the exposure bias made a much bigger difference in my photos. Based on these, I would probably only try manipulating the white balance if I was finding my photos were having a blue tinge.

Here’s another examples of manipulating the white balance, this time with the Exposure Bias adjusted to +1:

1 Auto
White Balance Auto

1 Cloudy
White Balance Cloudy

1 Flash
White Balance Flash

This time I think the colors in the cloudy setting might be a bit better.

Metering Mode – to let your camera better adjust the light levels

The auto setting for my camera is a matrix metering mode, where light information from the whole scene is used to determine the exposure of your photo. This can sometimes be problematic if the scene is too bright (as snow can often be) because your camera doesn’t know what you want to be the focus of your photograph. You can tell your camera to use a specific area of your photo to determine the exposure by using spot metering.

In the following three photos I tried out the three metering setting on my camera, Matrix, Center Weight and Spot:

AP Matrix, 0, Auto
Matrix Metering

AP, Metering - Center Weight AP, 0, Auto, Spot
Center Weight Metering                             Spot Metering

Here I think the Matrix Metering was the best. I suspect that Because it was overcast the snow wasn’t bright enough to make this manipulation worthwhile. It’s also worth noting that on my camera spot metering was the default in Aperture Priority mode so that probably accounts for why in my initial two photographs the one taken on the auto setting was a bit better.

Showing Off My New Skills

1 Auto
Exposure Bias +1, Auto White Balance

DSC_0461
Exposure Bias +1, White Balance Cloudy

How to Make the Adjustments

The instructions below are specific to the Nikon D90. Your camera may use different controls – I recommend searching for your camera and the control you want to manipulate on http://www.dummies.com or looking in your manual if you need more specific instructions on the controls for your camera.

d90-top_snowpics

d90-back_snowpics
Original Nikon D90 Photos by Nikon

1. Adjusting the Exposure Bias
Hold down the Exposure Bias button (+/-) on the top of the camera and use the scroll wheel to choose the exposure bias you want. You will see the setting in the display window on the top of your camera.

2. Adjusting the White Balance
Hold down the White Balance Button (WB) on the back of the camera and use the scroll wheel to choose the white balance you want. You will see the setting in the display window on the top of your camera. On my camera the Automatic setting is and A, the flash setting is a lightening bolt and the Cloud setting looks like a dark cloud.

3. Adjusting the Metering Mode
Hold down the Metering Mode Button on the top of the camera and use the scroll wheel to select the mode you want. will see the setting in the display window on the top of your camera. The single point mode looks like a single dot, centering weight is a dot surrounded by parentheses and matrix mode looks like a dot with a border around it.

Sources used for this article:

http://www.geofflawrence.com/snow.html

http://www.shotaddict.com/tips/article_Main+Things+To+Know+About+Winter+Shooting.html

http://www.dummies.com/how-to/content/understanding-all-the-nikon-d90s-controls.html

Nikon D3200 From Snapshots to Great Shots by Rob Sylvan

Filed Under: photography Tagged With: feature, slider

Learning to Use my DSLR Camera

October 18, 2012 by danawyyc 3 Comments

Practical SRL Photo Tutorials

I have a digital SLR camera. Actually we have two, a Nikon20-DSC_0047-001 D90 and a Nikon D60. I don’t think I’m out of line to say that I take beautiful pictures. I am by no means a professional but at least sometimes I doubt that you’d be able to tell.

But I know very little about using my camera and I don’t think I’m alone here. I typically use my camera on the no flash setting and it’s basically a point and shoot. It works great. Which is one of the things that I love about this camera.

My consistency suffers though. I can take great pictures, but I can’t always do them every time I want to. I’m looking to up my photography game by learning more about what my camera can do and what to do to take the pictures I want to take – every time.

I’m generally going to start with the basics and move on from there and share my journey along the way. I know I’m going to learn a lot and hopefully you will too.

DSC_0250  snowDSC_0288umbrella

Filed Under: photography

Primary Sidebar

About Me

I'm an experiential playground expert and mom to three young kids. I live with my husband in Calgary, Alberta, Canada. When I'm not looking after people, I'm reading all the YA fiction I can get my hands on and am attempting to learn photography. My laundry-folding suffers due to more interesting pursuits.

You can also find me over at:
12 Great Salads to Take to a Potluck or Feed a Big Group - talkinginallcaps.com

11 Great Salads to Take to a Potluck or Feed a Big Group

Sriracha tomato soup - easy meals - talkinginallcaps.com

12 Easy Meals That are Great for One or Two (or more!)

Asian Lentil and Mango Salad 3

Salad #49 – Asian Lentil and Mango Salad

Kale, Quinoa and Black Bean Salad

Salad #42 – Kale, Quinoa and Black Bean Salad

Disneyland Photography Tips - 11 Tips for Getting Great Photos Your Family Will Treasure

Disneyland Photography Tips – 11 Tips for Getting Great Photos of Your Disneyland Vacation

11 Tips for Taking a Toddler and a Preschooler to Disneyland

Categories

Archives

Footer

Copyright © 2025 · Foodie Pro Theme by Shay Bocks · Built on the Genesis Framework · Powered by WordPress