Google+ talkinginallcaps@gmail.com
  • Skip to primary navigation
  • Skip to main content
  • Skip to primary sidebar
  • Skip to footer

Talking in ALL CAPS

  • Food
    • 52 Salads Recipe Index
    • 52 Soups Recipe Index
  • Photography
  • Travel
    • Travel
    • US National Parks
    • Washington DC
    • Disneyland
  • Thoughts
    • Thoughts
    • Motherhood
    • Parenting
  • Calgary
  • About Me

Vegetarian

Broccoli and Cheese Pizza

April 27, 2011 by danawyyc Leave a Comment

I found the inspiration for this recipe on Healthy Happy Life a vegan food blog. I seem to spend a disproportionate amount of time on vegan food blogs for someone is not even remotely vegan in my eating habits.

Gordie has been a little suspicious of green food lately (except edamame which he loves), so he was not particularly impressed by this choice. But I think it might lure in some reluctant broccoli eaters.

Print
Broccoli and Cheese Pizza
 
Ingredients
  • broccoli
  • shredded cheese
  • cream cheese (regular or any kind of savoury flavoring)
  • olive oil
  • garlic
  • whole wheat pitas
Instructions
  1. Spread a thin layer of olive oil on the pita. Add thin slices of garlic. I used about a clove per pita.
  2. Add thin slices of broccoli. For mine I used the whole ‘tree’ but for Gordie’s I used little bits of the florets (pictured on the right).
  3. Add little splotches of cream cheese (about 1 tbsp total) around the pita.
  4. Top with shredded cheese.
  5. Bake for about 5 minutes. I used the toaster oven so I did 3 minutes on bake and 2 on broil. Basically your goal is to melt the cheese without burning the pita too much.
  6. I used sundried tomato cream cheese which was nice, but I really think any would be fine.
3.2.2925

I used whole wheat pitas for the ‘dough’ and that worked well, but I think I would probably blanch the broccoli quickly in the microwave if I was doing it again just so they were cooked a little bit extra. This wouldn’t be a problem if you were using base that wasn’t quite so thin.

Broccoli and Cheese Pizza

Broccoli and Cheese Pizza

I really enjoyed these and will definitely make them again. I wouldn’t skip the cream cheese though. I tried one without it and it just needed a little something extra.

Filed Under: Easy Meals, Food, Recipes, Vegetarian

Cinnamon Raisin No-Knead Whole Wheat Bread

April 14, 2011 by danawyyc 3 Comments

Ever since I  first posted about No-Knead Bread I’ve been thinking about what kinds of variations I could try. Cinnamon raisin was first on my list. I love raisin bread, but I hate that you can just about never get it on whole wheat bread. So I gave it a go and it is awesome. Seriously I just want to eat this all day. Gordie loves all the bread I’ve made so more. He asks for Mommy’s bread all the time.

This recipe and directions are almost identical to my Whole Wheat No-Knead Bread Recipe. There is the obvious additions of raisins and cinnamon, a slight increase in the amount of yeast because cinnamon inhibits yeast production and a little extra water.

Note: you will need an oven proof dish with a heavy lid to make this –  Dutch ovens are perfect for this but other oven proof dishes like casserole dishes can work too.

image

(Adapted from Calgarian Julie Van Rosendaal’s take on Jim Lahey’s no knead bread method on babble.com)

5.0 from 1 reviews
Print
Cinnamon Raisin No-Knead Whole Wheat Bread
 
Ingredients
  • 3 cups whole wheat flour
  • 1 tsp cinnamon
  • 1 cup raisins
  • ½ tsp yeast
  • 1 tsp salt
  • 2½ cups water (this is more than the standard recipe because whole wheat flour is thirstier than refined flour and it’s even more than my regular whole wheat flour recipe because the raisins soak up some of the water)
  • wheat bran, cornmeal or additional flour for dusting (wheat bran worked really well)(I use Robin Hood – Best for Bread Flour which works well as it is high in protein as most Canadian flours are which is necessary for making good bread)
Instructions
  1. In a large mixing bowl stir the flour, yeast, salt and cinnamon together with your hands. Then add the raisins.
  2. Add 2 cups of the water. Mix the dough and water together with your hands until you can no longer see dry flour. You can run your hands under the tap to wet them if you are worried about the dough sticking to them, but it’s not really necessary.
  3. Check your dough, it should look wet but the flour shoimageuld absorb all the water. You couldn’t knead this dough if you wanted too. If your dough still looks dry add a little at a time and mix until it looks wet. I found 2½ cups of water to be perfect. Don’t stress out too much about it though, I’ve made it both too dry and too wet and the bread still turned out fine. It was just a little dense when it was too dry and it was harder to move when it was too wet.
  4. Cover the bowl with saran wrap and leave it on the counter for 12-24 hours. Whenever it is convenient for you. The dough should have risen noticeably and you’ll probably see some little bubbles at the top. image
  5. When you are ready sprinkle wheat bran, flour or corn meal on the top of the dough as well as on a large tea towel.
  6. Use a spatula to loosen the dough from the bowl and drop it onto one side of the tea towel. Fold the dough over on itself a few times and then sprinkle the flour (or whatever) on the top.
  7. Roll the dough onto the other side of the tea towel and coat the other side with flour (or whatever) again. Fold the tea towel over the top of the dough ball and leave it out for 1-2 hours. (Don’t leave it on the stove it will get all sticky and attach itself to the tea towel when you are preheating the stove – trust me).
  8. In the last half hour preheat the stove to 450F with your oven safe heavy lidded pot inside to make sure it’s nice and hot.
  9. Take the pot out of the oven and dust the inside with flour, this will help keep the raisins from sticking and burning to the bottom (or whatever). Roll the dough into the hot pot, place the lid on and stick it in the oven for 30 minutes. Then, take the lid off and bake for 15 more minutes.
  10. For best results, let the loaf cool before eating, but if you really want warm bread, you can cut it right away and it’s still really good.
3.2.2925

imageI’m sure this would be lovely with some butter or cinnamon cream cheese,  but I eat it straight up.

Filed Under: breads, Food, Recipes, Vegan, Vegetarian

Almond Zucchini Sauté–Tired Mom Side Dish

April 8, 2011 by danawyyc 2 Comments

I often seem to either make either a good side dish or a good meal but not both when I’m making supper. So I’m always on the lookout for quick, easy and healthy side dishes that I can manage to make in addition to whatever else I’m making for supper. When I saw this zucchini dish at Smitten Kitchen I knew I’d found a winner.

image

Print
Almond Zucchini Sauté–Tired Mom Side Dish
 
Ingredients
  • 1 TBSP olive oil
  • 1 small handful of sliced almonds
  • 1 normal sized zucchini (cut into sticks, you can cut them smaller than I’ve done above, I just don’t have the machinery or the patience)
  • optional: salt, pepper, parmesan cheese
Instructions
  1. Heat the oil over medium heat. Add the almonds and sauté for a couple minutes until they are browned.
  2. Add the zucchini and cook for about a minute just until the zucchini is heated.
  3. Add a little salt and pepper and parmesan if you want. It’s really good with them, but I often forget and it’s still good.
3.2.2925


image


Filed Under: Food, Recipes, Snacks, Vegan, Vegetarian

No-Knead Whole Wheat Bread

April 7, 2011 by danawyyc 2 Comments

I’ve started baking my own bread. I made my first loaf on March 25. It’s now 11 days later and I have made 6 loaves of bread so far. I feel like some kind of supermom. But it’s so quick, easy and flexible that no superpowers are actually necessary. Seriously, I am at best an amateur cook, I rarely bake and never anything with dough – if I can make this, so can you. The only catch is you need a oven proof dish with a heavy lid. Dutch ovens are perfect for this. I managed to get one at Costco this fall for only $50 so that’s what I’ve been using but there are other things that can work like casserole dishes if you want to give it a try.

I’ve also made a number of mistakes that I’ve learned from that I’ll share as well. Amazingly despite the mistakes every loaf I’ve made has still turned out. This recipe is really resilient.

(Adapted from Calgarian Julie Van Rosendaal’s take on Jim Lahey’s no knead bread method on babble.com)

Print
No-Knead Whole Wheat Bread
 
Ingredients
  • 3 cups whole wheat flour
  • ¼ tsp yeast
  • 1 tsp salt
  • 2¼ cups water (this is more than the standard recipe because whole wheat flour is thirstier than refined flour)
Instructions
  1. In a large mixing bowl stir the flour, yeast and salt together with your hands.
  2. Add 2 cups of the water. Mix the dough and water together with your hands until you can no longer see dry flour. You can run your hands under the tap to wet them if you are worried about the dough sticking to them, but it’s not really necessary.
  3. Check your dough, it should look wet but the flour should absorb all the water.You couldn’t knead this dough if you wanted too. If your dough still looks dry add a little at a time and mix until it looks wet. I found 2¼ cups of water to be perfect. Don’t stress out too much about it though, I’ve made it both too dry and too wet and the bread still turned out fine. It was just a little dense when it was too dry and it was harder to move when it was too wet.
  4. Cover the bowl with saran wrap and leave it on the counter for 12-24 hours. Whenever it is convenient for you. The dough should have risen noticeably and you’ll probably see some little bubbles at the top.
  5. When you are ready sprinkle wheat bran, flour or corn meal on the top of the dough as well as on a large tea towel.
  6. Use a spatula to loosen the dough from the bowl and drop it onto one side of the tea towel. Fold the dough over on itself a few times and then sprinkle the flour (or whatever) on the top.
  7. Roll the dough onto the other side of the tea towel and coat the other side with flour (or whatever) again. Fold the tea towel over the top of the dough ball and leave it out for 1-2 hours. (Don’t leave it on the stove it will get all sticky and attach itself to the tea towel when you are preheating the stove – trust me).
  8. In the last half hour preheat the stove to 450F with your oven safe pot inside to make sure it’s nice and hot.
  9. Take the pot out of the oven and dust the inside with flour (or whatever). Roll the dough into the hot pot, place the lid on and stick it in the oven for 30 minutes. Then, take the lid off and bake for 15 more minutes.
  10. For best results, let the loaf cool before eating, but if you really want warm bread, you can cut it right away and it’s still really good.
3.2.2925

image

This looks like a lot of steps but is really very little work and not very hard. Check out this youtube video where Jim Lahey demonstrates the process.

image

Filed Under: breads, Food, Recipes, Vegan, Vegetarian

Making Muffins– Whole Wheat Pumpkin Ginger Nut Muffins

March 31, 2011 by danawyyc 1 Comment

I don’t bake very often. I like baking. In fact it used to be one of my favorite things to do when I was stressed. But I found that stress eating and stress baking were going hand in hand. So I decided that perhaps I should try different ways to manage my stress and bake a little less. It didn’t hurt that around the same time the oven at our rental unit was broken (I could use the stove and broil things, but not bake) so I couldn’t bake even if I wanted to.

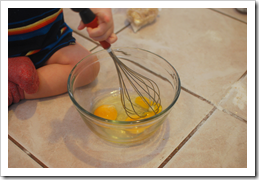
Baking can be so great to do with kids though. You don’t tend to need much in the way of sharp implements and the heat is all at the end. I love ginger and I had some left over canned pumpkin from the holidays so when I found this recipe from the food blog Simply Recipes, I was sure I had found a winner.

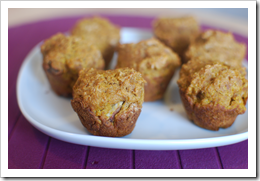
Gordie loved them! I made them into mini-muffins because they are easier for little hands to hold.  The pumpkin provides some good nutrients, but I wanted to see if they’d still be good if I used whole wheat flour. They weren’t quite as light as the white flour ones (or as pretty) but they were good and Gordie loved them just as much.

image

Print
Making Muffins– Whole Wheat Pumpkin Ginger Nut Muffins
 
Ingredients
  • 1½ cups whole wheat flour
  • ½ teaspoon salt1 cup sugar
  • 1 teaspoon baking soda
  • 1 cup pumpkin pure
  • ⅓ cup melted butter
  • 2 eggs beaten
  • ⅓ cup water
  • ½ tsp nutmeg
  • ½ tsp cinnamon
  • ½ tsp allspice
  • 1 tsp ground ginger
  • ½ cup chopped pecans
  • ¼ cup chopped candied ginger (I like them roughly chopped but most kids will probably like them better if they’re pretty finely chopped).
Instructions
  1. Preheat oven to 350F.
  2. Mix dry ingredients (flour, salt, sugar, baking soda, spices) in a large bowl.
  3. Beat eggs in a bowl and then add the wet ingredients (pumpkin, melted butter, water).
  4. Add the wet ingredients to the dry and mix with a fork. (I love how recipes say “do not over-mix” without over explaining what that means. I try to stop right after there isn’t any visible dry flour).
  5. Spoon into the mini-muffin cups (using my non-stick muffin tray I find it’s actually better not to grease the pan) and bake for 17-22 minutes. Test a muffin with a toothpick. If it does not come out clean, bake for a couple more minutes and retest.
  6. Makes about 24 mini-muffins.
3.2.2925

image image

image image

image

image

Filed Under: breads, Cooking with kids, Food, Snacks, Vegetarian

Peanut Butter Hummus

March 18, 2011 by danawyyc Leave a Comment

Print
Peanut Butter Hummus
 
Ingredients
  • ¼ teaspoon Garlic powder
  • ¼ cup Lemon juice
  • ¼ cup Water (more if needed)
  • 1 can (16 oz) Chickpeas ; rinsed and drained
  • 4 Tbsp Peanut Butter (I just used a big spoon)
  • 1 teaspoon Sea salt
Instructions
  1. Drain and rinse the chickpeas.
  2. Add all the ingredients to the food processor (you can use a blender, but it’s not really  not as effective. I have tried and don’t recommend it. I ended up buying a food processor so I could make hummus).
  3. Run the food processor until the hummus starts to appear to bounce up and down (this won’t take a really long time) . Alternatively just check it every 10 seconds or so. You’ll want to scrape off the sides of the food processor because I find some chickpeas tend to stick to the sides and then give it another quick blend. If you are finding it’s not as well mixed or creamy as you would like just add another ¼ cup of water.
3.2.2925

It’s funny how much how something is presented can change your attitude towards it. I’ve seen recipes for hummus that suggested you could substitute tahini with peanut butter on multiple occasions and I always thought that was kind of lame. Okay if you lived somewhere that you really couldn’t find any tahini, fine but otherwise?
Then one day my mom sent me a recipe for peanut butter hummus. Peanut butter hummus? Brilliant! Now I realize that this is actually the same thing that I previously thought was lame, but somehow now it sounds interesting and different instead of a cop out.
It’s pretty good too. The peanut butter taste isn’t overpowering but if your kid is a little adverse to hummus, this may be enough to win them over.
image
image
Cooking with the Kids
The kids can:

  • Measure and pour the ingredients
  • Rinse the chickpeas and put them in the food processor
  • Run the food processor (with supervision)

image
Per 1/8 of the hummus: Calories – 81, Carbs – 7g, Fat – 5g, Protein 4, Fibre – 2

Filed Under: Appetizers, Cooking with kids, Food, Recipes, Snacks, Vegan, Vegetarian

Salt and Pepper Popcorn

March 17, 2011 by danawyyc Leave a Comment

Air popped popcorn can be a great healthy snack, but a little… bland. I love salt and pepper potato chips so I decided to try to bring those flavors to the popcorn. It is super easy, delicious and really pretty healthy.

image

Directions
1. Pop your popcorn using your favorite method.
2. Spray or drizzle with oil or butter and sprinkle with salt and pepper.

I really like using extra virgin olive oil in my misto sprayer and grinding pepper and sea salt over top. It’s best to spray and sprinkle, toss and then repeat a few times.

Filed Under: Food, Recipes, Snacks, Vegan, Vegetarian

Curry Gnocchi – Vegetarian

March 14, 2011 by danawyyc Leave a Comment

Gordie was helping me pick out ingredients from the pantry and figured we should have Gnocchi. And then decided that he wanted chickpeas too. I was a little thrown. I usually just serve Gnocchi with a tomato pasta sauce. So I poked around the internet and that that some people combined these two ingredients with canned tomatoes. That was definitely something I could work with. When I run out of canned tomatoes I sometimes feel like I’ve lost the ability to cook. I decided to add some chopped spinach I had in the freezer which reminded me of an Indian dish so I added some currry spices. Gordie is a little iffy on the spinach (and green food in general at the moment) but loved everything else. The dish I made was a pretty mild curry without too much heat but you could always add more if you were so inclined.image

Print
Curry Gnocchi - Vegetarian
 
Ingredients
  • 1 tablespoon olive oil
  • 1 large can diced tomatoes
  • 1 can chickpeas (rinsed and drained)
  • 1 block of chopped frozen spinach
  • 1 package of Gnocchi
  • 1 tablespoon curry powder
  • 1 tablespoon Garam Masala (an indian spice mix, you can get it here in Calgary in Superstore in the Indian spice section – not the baking aisle)
  • If you can’t find or don’t want to buy Garam Masala just use twice the curry powder.
Instructions
  1. Heat some oil in a pan. Mix in the spices, tomatoes and chickpeas. You can basically cook this for as long as you want on a low simmer. I’d recommend at least 10-15 minutes.
  2. When you are about 10 minutes from serving, put a pot of water on to boil. Add the Gnocchi to the boiling water. After a few minutes the gnocchi will float to the top. Use a slotted spoon to scoop the floating gnocchi into a bowl (it would also be fine to put them directly into the pan with the tomatoes and chickpeas).
  3. Defrost the spinach in the microwave. As soon as it has thawed, squeeze the water out of it. The spinach will look the best if you add it to the pan close to when you plan on serving it but it will still taste fine if it cooks for a while.
  4. Cook the spinach, tomatoes and chickpeas until the spinach is heated.
3.2.2925


image
Cooking with the Kids
The kids can:

  • Pour the cans into the pan
  • Measure and pour the spices
  • Stir the vegetables under close supervision

image
Per 1/4 of the Curry Gnocchi: Calories – 316, Carbs – 56g, Fat – 6g, Protein 12, Fibre – 7.

Filed Under: Cooking with kids, Easy Meals, Food, Recipes, Vegetarian

Carrot Cake Oatmeal–Slow Cooker Method

March 13, 2011 by danawyyc 1 Comment

Carrot Cake Oatmeal - Slow Cooker Method

I got the inspiration for this dish from Oh She Glows (great vegan recipe ideas). I thought the concept would be perfect for the slow cooker and simplified it so it would be easier for me to throw together before bed.

I’m really pleased with how it turned out. I would definitely recommend adding a little maple syrup (or your favorite sugar like substance) on top because that really takes it from good oatmeal to carrot cake. My husband liked it even though he always complains whenever I use pecans or walnuts. Gordie seemed to like it too even though it often rejects carrots recently. They didn’t bother him at all in this. Bottom line – I will definitely be making it again because I loved it.

Print
Carrot Cake Oatmeal–Slow Cooker Method
Recipe type: Breakfast
 
Ingredients
  • 1 Cup Steel Cut Oats
  • 2 Cups Water
  • 2½ Cups Milk (I’ve tried skim and soy – both good)
  • 2 cups of carrots finely grated (2-3 good sized carrots, I have used a coarse grate and it was fine, just not as good)
  • 1 Tsp Cinnamon
  • ½ tsp ground ginger
  • ¼ tsp ground nutmeg
  • 1 tsp vanilla extract
  • ¼ cup walnuts/pecans (I always substitute pecans, I find them less bitter)
  • ¼ cup raisins
  • top with milk and maple syrup
  • I think a little cream cheese mixed in would be great, but I haven’t had a chance to try it.
Instructions
  1. Place the first 8 ingredients in a crock pot and stir to combine.
  2. Cook the oatmeal on “warm” for 6-9 hours (If I put it on low overnight half of it sticks to the side of the crockpot, you may be able to put yours on low overnight if yours doesn’t run quite as hot as mine. If you don’t have a warm setting reduce the cooking time or just deal with it).
  3. When you get up, pop in the raisins and walnuts.and turn the heat up to low. Cook for 20-30 more minutes and serve with milk and maple syrup.
3.2.1290


Photography Note: It is hard to take appealing pictures of goopy things. Toppings really help make it look more attractive.

Filed Under: Crockpot, Easy Meals, Food, Recipes, Vegetarian

My Favorite Basic Hummus Recipe

March 11, 2011 by danawyyc Leave a Comment

I’m going to try out a few different hummus variations in the next couple of weeks, so I thought I’d first share my go-to hummus recipe. There’s about a million different hummus recipes out there but I do really love this one. I prefer the powdered garlic to fresh garlic as it gives it a more mellow flavor. I also strongly recommend making it a day ahead. The flavors have a chance to mix and the bitterness of the tahini (which I am a little sensitive to) is gone after a night in the fridge.

image

Print
My Favorite Basic Hummus Recipe
Recipe type: Dip
 
Ingredients
  • ¼ teaspoon Garlic powder
  • ¼ cup Lemon juice
  • ¼ cup Water (more if needed)
  • 1 can (16 oz) Chickpeas ; rinsed and drained
  • ½ cup Tahini
  • 1 teaspoon Sea salt
Instructions
  1. Drain and rinse the chickpeas.
  2. Add all the ingredients to the food processor (you can use a blender, but it’s not really not as effective. I have tried and don’t recommend it. I ended up buying a food processor so I could make hummus).
  3. Run the food processor until the hummus starts to appear to bounce up and down (this won’t take a really long time) . Alternatively just check it every 10 seconds or so. You’ll want to scrape off the sides of the food processor because I find some chickpeas tend to stick to the sides and then give it another quick blend. If you are finding it’s not as well mixed or creamy as you would like just add another ¼ cup of water.
3.2.2925

My favorite basic hummus recipe

I find this makes quite a lot of hummus so I usually freeze half. It freezes really well.


Filed Under: Appetizers, Food, Recipes, Snacks, Vegan, Vegetarian

« Previous Page
Next Page »

Primary Sidebar

About Me

I'm an experiential playground expert and mom to three young kids. I live with my husband in Calgary, Alberta, Canada. When I'm not looking after people, I'm reading all the YA fiction I can get my hands on and am attempting to learn photography. My laundry-folding suffers due to more interesting pursuits.

You can also find me over at:
12 Great Salads to Take to a Potluck or Feed a Big Group - talkinginallcaps.com

11 Great Salads to Take to a Potluck or Feed a Big Group

Sriracha tomato soup - easy meals - talkinginallcaps.com

12 Easy Meals That are Great for One or Two (or more!)

Asian Lentil and Mango Salad 3

Salad #49 – Asian Lentil and Mango Salad

Kale, Quinoa and Black Bean Salad

Salad #42 – Kale, Quinoa and Black Bean Salad

Disneyland Photography Tips - 11 Tips for Getting Great Photos Your Family Will Treasure

Disneyland Photography Tips – 11 Tips for Getting Great Photos of Your Disneyland Vacation

11 Tips for Taking a Toddler and a Preschooler to Disneyland

Categories

Archives

Footer

Copyright © 2025 · Foodie Pro Theme by Shay Bocks · Built on the Genesis Framework · Powered by WordPress