Google+ talkinginallcaps@gmail.com
  • Skip to primary navigation
  • Skip to main content
  • Skip to primary sidebar
  • Skip to footer

Talking in ALL CAPS

  • Food
    • 52 Salads Recipe Index
    • 52 Soups Recipe Index
  • Photography
  • Travel
    • Travel
    • US National Parks
    • Washington DC
    • Disneyland
  • Thoughts
    • Thoughts
    • Motherhood
    • Parenting
  • Calgary
  • About Me

Snacks

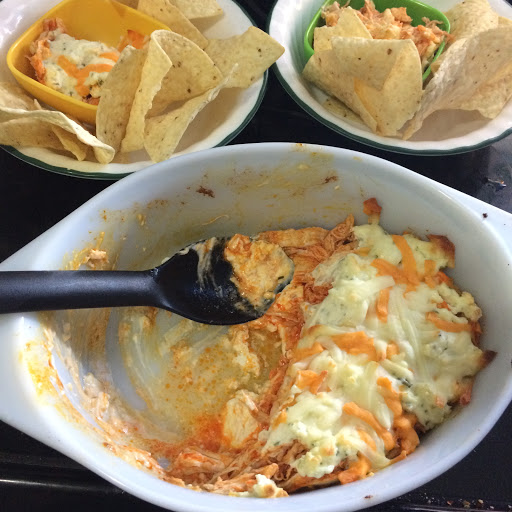
Frank’s Buffalo Chicken Dip – no blue cheese

September 2, 2018 by danawyyc 1 Comment

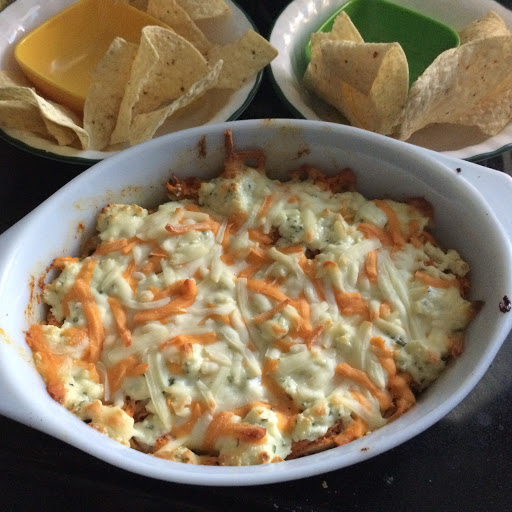
Frank's Buffalo Chicken Dip - No Blue Cheese

My friend Merry, makes a Buffalo Chicken dip that I really love. But I’m not really in love with blue cheese. I’ve tried different things to replace it but nothing was working like I wanted. One day I came across a post by Julie from Dinner with Julie about making a dip for hot wings out of Bousin cheese and I had the answer. It worked perfectly and is now my new favorite thing to make for a potluck.

5.0 from 1 reviews
Print
Frank's Buffalo Chicken Dip - no blue cheese
 
Ingredients
  • 8 oz brick cream cheese
  • 2 cups cooked chicken, shredded or chopped (I like using leftover rotisserie chicken)
  • ½ cup Frank's Red Hot Sauce (I used Frank’s Buffalo Wing Sauce (not hot sauce))
  • 2-4 Tbsp butter, melted (more butter will tone down the heat)
  • 1 package boursin cheese
  • ¼ to ½ cup mozzarella cheese shredded
Instructions
  1. Preheat oven to 300°F.
  2. Mix melted butter and hot sauce. Combine with chicken.
  3. Layer in a shallow oven proof dish - first cream cheese, then chicken mixture, then boursin and top with a light layer of mozzerella.
  4. Bake for until mozzerella is melted - about 20 minutes.
  5. Great served with tortilla chips, or you can use it as a veggie dip for carrots or celery. It's also super good on a bed of lettuce.
3.2.2925


Frank's Buffalo Chicken Dip - No Blue Cheese

Filed Under: Appetizers, Food, Recipes, Snacks

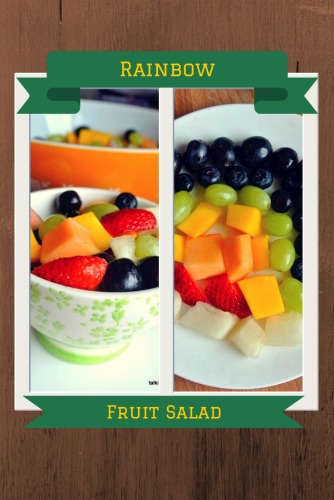
Salad #48 – Rainbow Fruit Salad

May 29, 2014 by danawyyc 2 Comments


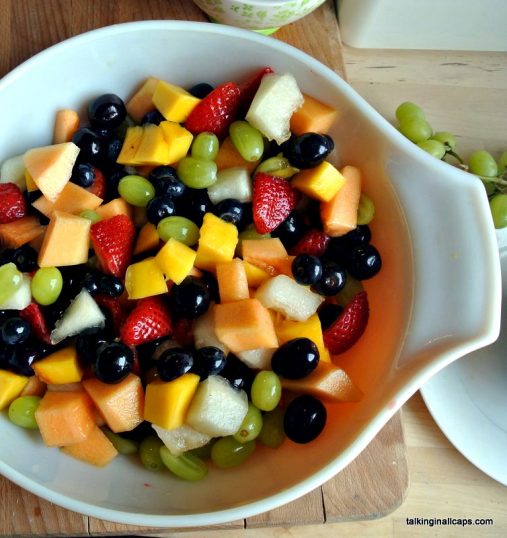
rainbow fruit salad

I decided to make a fruit salad for my daughter’s 2nd birthday. Her very favorite thing to eat is fruit so I thought it would be perfect. (I did make other things too). For some reason she likes berries and grapes, but not in her fruit salad. Who knew?

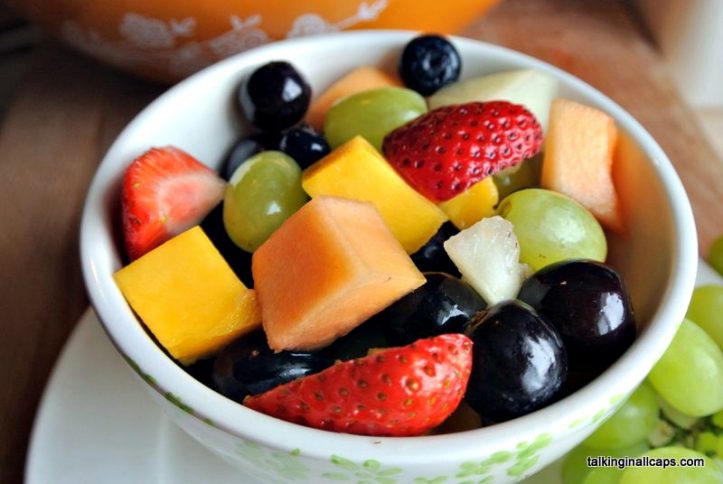
rainbow fruit salad

Print
Salad #48 - Rainbow Fruit Salad
Author: Dana
Recipe type: Salad
 
Ingredients
  • 1 tablespoon honey
  • juice of 1 lime (adding the zest would be nice too)
  • strawberries
  • cantaloupe
  • mango
  • green grapes
  • blueberries
  • purple grapes
  • yellow honeydew
Instructions
  1. Cut the strawberries in half and cut the cantaloupe, honeydew and mango into chunks. Leave the grapes and blueberries whole.
  2. Put them all into a large bowl.
  3. Mix the honey and lie juice together and pour over the fruit.
3.2.1303

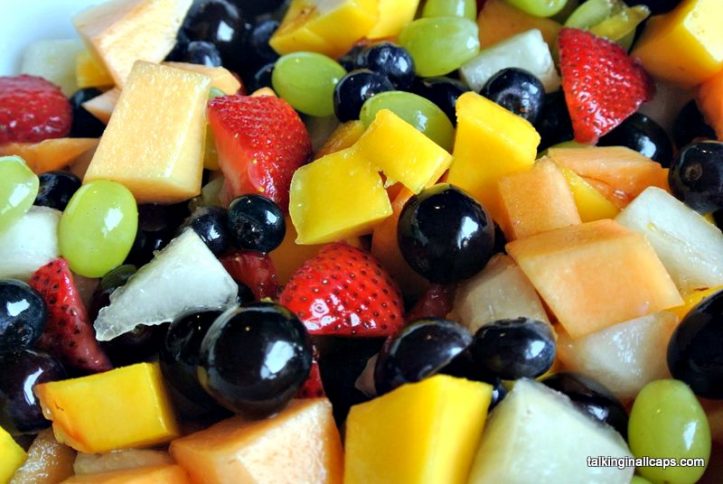
rainbow fruit salad


Did They Eat It?

Gordie (5 years old): I liked all the strawberries and the grapes.

Nicky (2 years old):Loved everything but the strawberries and the grapes.

Stephen: Awesome. [I think he is making fun of me but I’m pretty sure he liked it].

Dana: Really pretty and easy to make.


rainbow fruit salad

Filed Under: 52 Salads, Food, Recipes, Salads, Side Dishes, Snacks, Vegetarian

Chocolate Hazelnut Hummus

April 21, 2011 by danawyyc 1 Comment

Hazelnut butter is the only nut butter that I’ve tried that might give peanut butter a run for it’s money. It’s just so good. So it was almost inevitable that my hummus experimentation would end with Nutella inspired hazelnut hummus. It was way better than the peanut butter hummus. I ended up leaving it a little chunkier than I usually do with hummus which gave it a really nutty feel. I ate the whole batch with apples for dipping (over a few days of course!) And I didn’t even share. Yes, it is that good.

Hazelnut butter is not as easy to find as peanut butter or even almond butter. In the superstore by my house you can find it in the aisle with the organic food, soy, and gluten free products. Not in the peanut butter and jam aisle.

Chocolate Hazelnut Hummus

Print
Chocolate Hazelnut Hummus
 
Ingredients
  • 1 can (16 oz) Chickpeas ; rinsed and drained
  • 4 Tbsp Hazelnut butter or 2 TBSP hazelnut butter and 2 Tbsp peanut butter (I just used a big spoon – more if desired)
  • ½ teaspoon Sea salt
  • 1 teaspoon vanilla
  • ¼ cup cocoa powder
  • 4 Tbsp maple syrup (you can adjust this to taste (2-8 Tbsp)
  • ½- 3/4 cup Water (depending on the texture desired)
Instructions
  1. Drain and rinse the chickpeas.
  2. Add all the ingredients to the food processor (you can use a blender, but it’s not really not as effective. I have tried and don’t recommend it. I ended up buying a food processor so I could make hummus).
  3. Run the food processor until the hummus starts to appear to bounce up and down (this won’t take a really long time) . Alternatively just check it every 10 seconds or so. You’ll want to scrape off the sides of the food processor because I find some chickpeas tend to stick to the sides and then give it another quick blend. If you are finding it’s not as well mixed or creamy as you would like just add another ¼ cup of water.
  4. Serving Ideas With apple slices, as a sandwich spread, sauce on a dessert pizza, on crackers, with pita
3.2.2925


Filed Under: Appetizers, Cooking with kids, desserts and treats, Food, Recipes, Snacks

Almond Zucchini Sauté–Tired Mom Side Dish

April 8, 2011 by danawyyc 2 Comments

I often seem to either make either a good side dish or a good meal but not both when I’m making supper. So I’m always on the lookout for quick, easy and healthy side dishes that I can manage to make in addition to whatever else I’m making for supper. When I saw this zucchini dish at Smitten Kitchen I knew I’d found a winner.

image

Print
Almond Zucchini Sauté–Tired Mom Side Dish
 
Ingredients
  • 1 TBSP olive oil
  • 1 small handful of sliced almonds
  • 1 normal sized zucchini (cut into sticks, you can cut them smaller than I’ve done above, I just don’t have the machinery or the patience)
  • optional: salt, pepper, parmesan cheese
Instructions
  1. Heat the oil over medium heat. Add the almonds and sauté for a couple minutes until they are browned.
  2. Add the zucchini and cook for about a minute just until the zucchini is heated.
  3. Add a little salt and pepper and parmesan if you want. It’s really good with them, but I often forget and it’s still good.
3.2.2925


image


Filed Under: Food, Recipes, Snacks, Vegan, Vegetarian

Making Muffins– Whole Wheat Pumpkin Ginger Nut Muffins

March 31, 2011 by danawyyc 1 Comment

I don’t bake very often. I like baking. In fact it used to be one of my favorite things to do when I was stressed. But I found that stress eating and stress baking were going hand in hand. So I decided that perhaps I should try different ways to manage my stress and bake a little less. It didn’t hurt that around the same time the oven at our rental unit was broken (I could use the stove and broil things, but not bake) so I couldn’t bake even if I wanted to.

Baking can be so great to do with kids though. You don’t tend to need much in the way of sharp implements and the heat is all at the end. I love ginger and I had some left over canned pumpkin from the holidays so when I found this recipe from the food blog Simply Recipes, I was sure I had found a winner.

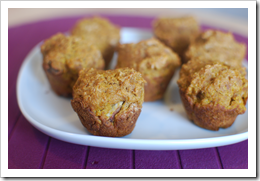
Gordie loved them! I made them into mini-muffins because they are easier for little hands to hold.  The pumpkin provides some good nutrients, but I wanted to see if they’d still be good if I used whole wheat flour. They weren’t quite as light as the white flour ones (or as pretty) but they were good and Gordie loved them just as much.

image

Print
Making Muffins– Whole Wheat Pumpkin Ginger Nut Muffins
 
Ingredients
  • 1½ cups whole wheat flour
  • ½ teaspoon salt1 cup sugar
  • 1 teaspoon baking soda
  • 1 cup pumpkin pure
  • ⅓ cup melted butter
  • 2 eggs beaten
  • ⅓ cup water
  • ½ tsp nutmeg
  • ½ tsp cinnamon
  • ½ tsp allspice
  • 1 tsp ground ginger
  • ½ cup chopped pecans
  • ¼ cup chopped candied ginger (I like them roughly chopped but most kids will probably like them better if they’re pretty finely chopped).
Instructions
  1. Preheat oven to 350F.
  2. Mix dry ingredients (flour, salt, sugar, baking soda, spices) in a large bowl.
  3. Beat eggs in a bowl and then add the wet ingredients (pumpkin, melted butter, water).
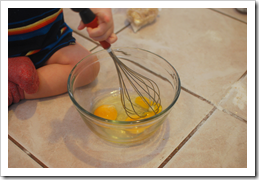
  4. Add the wet ingredients to the dry and mix with a fork. (I love how recipes say “do not over-mix” without over explaining what that means. I try to stop right after there isn’t any visible dry flour).
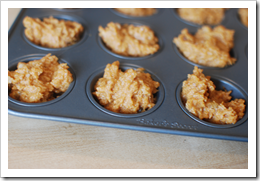
  5. Spoon into the mini-muffin cups (using my non-stick muffin tray I find it’s actually better not to grease the pan) and bake for 17-22 minutes. Test a muffin with a toothpick. If it does not come out clean, bake for a couple more minutes and retest.
  6. Makes about 24 mini-muffins.
3.2.2925

image image

image image

image

image

Filed Under: breads, Cooking with kids, Food, Snacks, Vegetarian

Chocolate Peanut Butter Hummus

March 26, 2011 by danawyyc 2 Comments

After making peanut butter hummus I started to wonder if you could make a sweet hummus dish instead of the traditional savory hummus. A peek around the internet proved that this was indeed possible so I decided to give it a try. Now some of the sites I visited suggested that this could be an actual dessert. I’m still not sold on that. What I made would not really be good as an ice cream topping for instance, and if I were to add enough sugar and fat to make it that way, I’d rather just go for broke and use caramel sauce.

Instead I would suggest using it as a Nutella alternative. Or as a way to try to get your kids to try beans. Sort of a gate way food for beans.  Overall, it wasn’t bad, people who tried it generally liked it, but I don’t think I’m going to have to make a new batch every week.

I’ve give a wide range for the maple syrup because it’s so easy to adjust to taste as you can just add more in and pulse the food processor for a few more seconds. We found that the cocoa came out more with less maple syrup, but it is definitely sweeter with more.

Print
Chocolate Peanut Butter Hummus
 
Ingredients
  • 1 can (16 oz) Chickpeas ; rinsed and drained
  • 4 Tbsp Peanut Butter (I just used a big spoon – more if desired)
  • ½ teaspoon Sea salt
  • 1 teaspoon vanilla
  • ¼ cup cocoa powder
  • 2-8 Tbsp maple syrup
  • ¼ cup Water (more if needed)
Instructions
  1. Drain and rinse the chickpeas
  2. Add all the ingredients to the food processor (you can use a blender, but it’s not really not as effective. I have tried and don’t recommend it. I ended up buying a food processor so I could make hummus).
  3. Run the food processor until the hummus starts to appear to bounce up and down (this won’t take a really long time) . Alternatively just check it every 10 seconds or so. You’ll want to scrape off the sides of the food processor because I find some chickpeas tend to stick to the sides and then give it another quick blend. If you are finding it’s not as well mixed or creamy as you would like just add another ¼ cup of water.
3.2.2925

image
imageimage

Cooking with the Kids
The kids can:

  • Measure and pour the ingredients
  • Rinse the chickpeas and put them in the food processor
  • Run the food processor (with supervision)

Serving Ideas With apple slices, as a sandwich spread, sauce on a dessert pizza, on crackers, with pita

Filed Under: Appetizers, Cooking with kids, Food, Recipes, Snacks

Peanut Butter Hummus

March 18, 2011 by danawyyc Leave a Comment

Print
Peanut Butter Hummus
 
Ingredients
  • ¼ teaspoon Garlic powder
  • ¼ cup Lemon juice
  • ¼ cup Water (more if needed)
  • 1 can (16 oz) Chickpeas ; rinsed and drained
  • 4 Tbsp Peanut Butter (I just used a big spoon)
  • 1 teaspoon Sea salt
Instructions
  1. Drain and rinse the chickpeas.
  2. Add all the ingredients to the food processor (you can use a blender, but it’s not really  not as effective. I have tried and don’t recommend it. I ended up buying a food processor so I could make hummus).
  3. Run the food processor until the hummus starts to appear to bounce up and down (this won’t take a really long time) . Alternatively just check it every 10 seconds or so. You’ll want to scrape off the sides of the food processor because I find some chickpeas tend to stick to the sides and then give it another quick blend. If you are finding it’s not as well mixed or creamy as you would like just add another ¼ cup of water.
3.2.2925

It’s funny how much how something is presented can change your attitude towards it. I’ve seen recipes for hummus that suggested you could substitute tahini with peanut butter on multiple occasions and I always thought that was kind of lame. Okay if you lived somewhere that you really couldn’t find any tahini, fine but otherwise?
Then one day my mom sent me a recipe for peanut butter hummus. Peanut butter hummus? Brilliant! Now I realize that this is actually the same thing that I previously thought was lame, but somehow now it sounds interesting and different instead of a cop out.
It’s pretty good too. The peanut butter taste isn’t overpowering but if your kid is a little adverse to hummus, this may be enough to win them over.
image
image
Cooking with the Kids
The kids can:

  • Measure and pour the ingredients
  • Rinse the chickpeas and put them in the food processor
  • Run the food processor (with supervision)

image
Per 1/8 of the hummus: Calories – 81, Carbs – 7g, Fat – 5g, Protein 4, Fibre – 2

Filed Under: Appetizers, Cooking with kids, Food, Recipes, Snacks, Vegan, Vegetarian

Salt and Pepper Popcorn

March 17, 2011 by danawyyc Leave a Comment

Air popped popcorn can be a great healthy snack, but a little… bland. I love salt and pepper potato chips so I decided to try to bring those flavors to the popcorn. It is super easy, delicious and really pretty healthy.

image

Directions
1. Pop your popcorn using your favorite method.
2. Spray or drizzle with oil or butter and sprinkle with salt and pepper.

I really like using extra virgin olive oil in my misto sprayer and grinding pepper and sea salt over top. It’s best to spray and sprinkle, toss and then repeat a few times.

Filed Under: Food, Recipes, Snacks, Vegan, Vegetarian

My Favorite Basic Hummus Recipe

March 11, 2011 by danawyyc Leave a Comment

I’m going to try out a few different hummus variations in the next couple of weeks, so I thought I’d first share my go-to hummus recipe. There’s about a million different hummus recipes out there but I do really love this one. I prefer the powdered garlic to fresh garlic as it gives it a more mellow flavor. I also strongly recommend making it a day ahead. The flavors have a chance to mix and the bitterness of the tahini (which I am a little sensitive to) is gone after a night in the fridge.

image

Print
My Favorite Basic Hummus Recipe
Recipe type: Dip
 
Ingredients
  • ¼ teaspoon Garlic powder
  • ¼ cup Lemon juice
  • ¼ cup Water (more if needed)
  • 1 can (16 oz) Chickpeas ; rinsed and drained
  • ½ cup Tahini
  • 1 teaspoon Sea salt
Instructions
  1. Drain and rinse the chickpeas.
  2. Add all the ingredients to the food processor (you can use a blender, but it’s not really not as effective. I have tried and don’t recommend it. I ended up buying a food processor so I could make hummus).
  3. Run the food processor until the hummus starts to appear to bounce up and down (this won’t take a really long time) . Alternatively just check it every 10 seconds or so. You’ll want to scrape off the sides of the food processor because I find some chickpeas tend to stick to the sides and then give it another quick blend. If you are finding it’s not as well mixed or creamy as you would like just add another ¼ cup of water.
3.2.2925

My favorite basic hummus recipe

I find this makes quite a lot of hummus so I usually freeze half. It freezes really well.


Filed Under: Appetizers, Food, Recipes, Snacks, Vegan, Vegetarian

Primary Sidebar

About Me

I'm an experiential playground expert and mom to three young kids. I live with my husband in Calgary, Alberta, Canada. When I'm not looking after people, I'm reading all the YA fiction I can get my hands on and am attempting to learn photography. My laundry-folding suffers due to more interesting pursuits.

You can also find me over at:
12 Great Salads to Take to a Potluck or Feed a Big Group - talkinginallcaps.com

11 Great Salads to Take to a Potluck or Feed a Big Group

Sriracha tomato soup - easy meals - talkinginallcaps.com

12 Easy Meals That are Great for One or Two (or more!)

Asian Lentil and Mango Salad 3

Salad #49 – Asian Lentil and Mango Salad

Kale, Quinoa and Black Bean Salad

Salad #42 – Kale, Quinoa and Black Bean Salad

Disneyland Photography Tips - 11 Tips for Getting Great Photos Your Family Will Treasure

Disneyland Photography Tips – 11 Tips for Getting Great Photos of Your Disneyland Vacation

11 Tips for Taking a Toddler and a Preschooler to Disneyland

Categories

Archives

Footer

Copyright © 2025 · Foodie Pro Theme by Shay Bocks · Built on the Genesis Framework · Powered by WordPress