Google+ talkinginallcaps@gmail.com
  • Skip to primary navigation
  • Skip to main content
  • Skip to primary sidebar
  • Skip to footer

Talking in ALL CAPS

  • Food
    • 52 Salads Recipe Index
    • 52 Soups Recipe Index
  • Photography
  • Travel
    • Travel
    • US National Parks
    • Washington DC
    • Disneyland
  • Thoughts
    • Thoughts
    • Motherhood
    • Parenting
  • Calgary
  • About Me

Appetizers

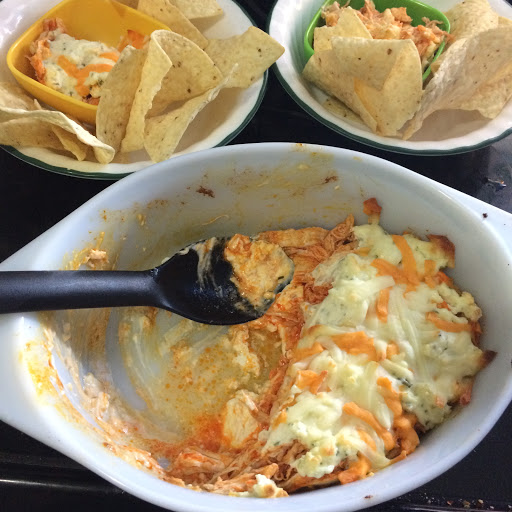
Frank’s Buffalo Chicken Dip – no blue cheese

September 2, 2018 by danawyyc 1 Comment

Frank's Buffalo Chicken Dip - No Blue Cheese

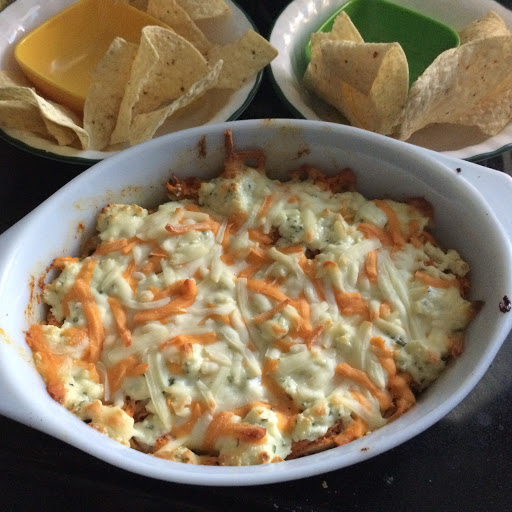
My friend Merry, makes a Buffalo Chicken dip that I really love. But I’m not really in love with blue cheese. I’ve tried different things to replace it but nothing was working like I wanted. One day I came across a post by Julie from Dinner with Julie about making a dip for hot wings out of Bousin cheese and I had the answer. It worked perfectly and is now my new favorite thing to make for a potluck.

5.0 from 1 reviews
Print
Frank's Buffalo Chicken Dip - no blue cheese
 
Ingredients
  • 8 oz brick cream cheese
  • 2 cups cooked chicken, shredded or chopped (I like using leftover rotisserie chicken)
  • ½ cup Frank's Red Hot Sauce (I used Frank’s Buffalo Wing Sauce (not hot sauce))
  • 2-4 Tbsp butter, melted (more butter will tone down the heat)
  • 1 package boursin cheese
  • ¼ to ½ cup mozzarella cheese shredded
Instructions
  1. Preheat oven to 300°F.
  2. Mix melted butter and hot sauce. Combine with chicken.
  3. Layer in a shallow oven proof dish - first cream cheese, then chicken mixture, then boursin and top with a light layer of mozzerella.
  4. Bake for until mozzerella is melted - about 20 minutes.
  5. Great served with tortilla chips, or you can use it as a veggie dip for carrots or celery. It's also super good on a bed of lettuce.
3.2.2925


Frank's Buffalo Chicken Dip - No Blue Cheese

Filed Under: Appetizers, Food, Recipes, Snacks

Pesto Potato Salad

April 2, 2018 by danawyyc 7 Comments

My father-in-law is from PEI so potatoes are basically considered their own food group in their house. Baked, mashed, fried, you name it. My son seems to be taking after him, he will often grab cold leftover potatoes out of the fridge for a snack and eat them straight up.

My favorite potatoes have always been little potatoes. I like that they require so little work – they don’t need to be peeled and they can be used whole or cut into bite sized pieces with just a slice or two. The other thing I like about little potatoes is because you don’t peel them, you keep all the good nutrients that are found in the peel.

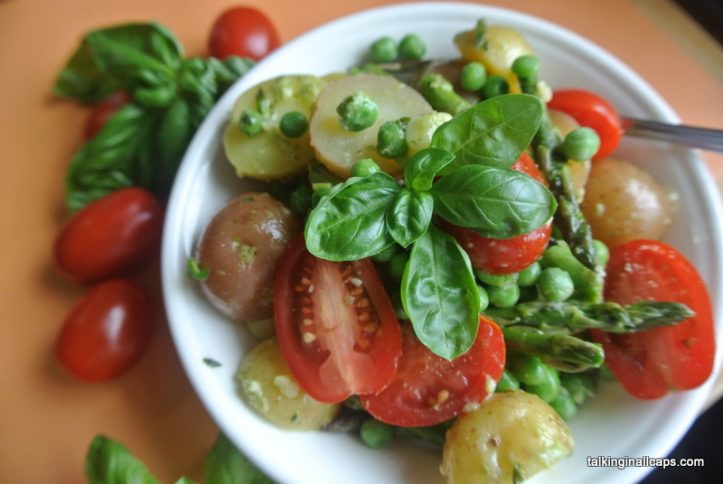
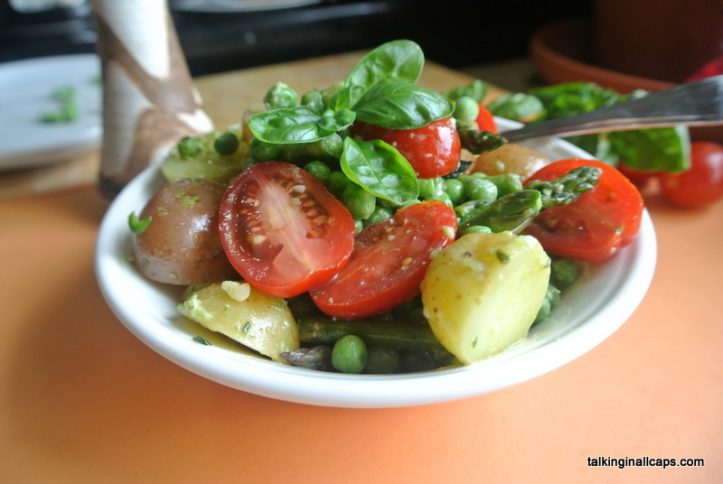
Pesto Potato Salad - Little Potato Company - talkiginallcaps.com

When I was thinking about what else I should make with them today, I remembered a dish that I’ve made before that contained pesto, gnocchi and vegetables. I figured that a variation on that would make a fantastic warm potato salad and I was right.

5.0 from 1 reviews
Print
Little Potato Company
 
Ingredients
  • 1.5 lbs of little potatoes
  • ½ cup of peas
  • ½ cup of asparagus or green beans chopped
  • ½ cup of grape tomatoes cut in half
  • 1-2 Tbsp of pesto
  • 4 slices of monterey jack cheese cubed or shredded
Instructions
  1. Boil little potatoes for approximately 15 minutes.
  2. Drain the potatoes toss with pesto.
  3. Add peas, asparagus (or green beans), grape tomatoes and cheese.
  4. Mix together and serve warm.
3.2.2708


Pesto Potato Salad - Little Potato Company - talkiginallcaps.com


Did They Eat It?

Gordie (5 years old): Are there any plain potatoes? I’ll just eat those.

Nicky (2 years old): I want ham.

Stephen: Good.

Dana: I liked this a lot. I would definitely make it again. I might not even try sharing next time!

Filed Under: Appetizers, Food, Salads, Side Dishes, Vegetarian Tagged With: potatoes

Salad #45 – Salad on a Stick

May 6, 2014 by danawyyc 6 Comments

Salad on a Stick


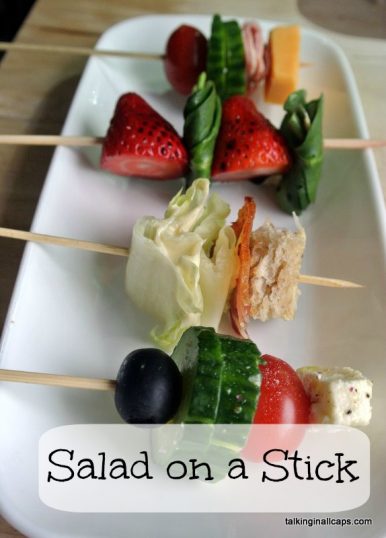
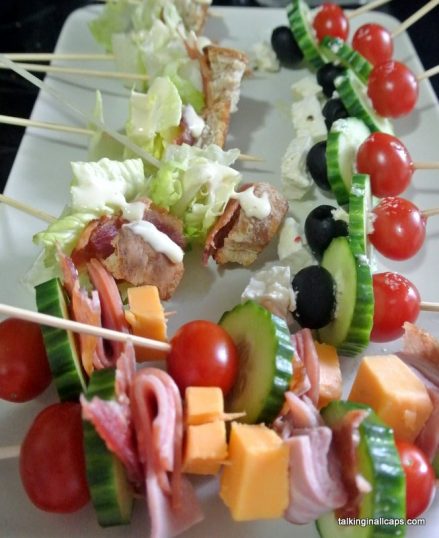
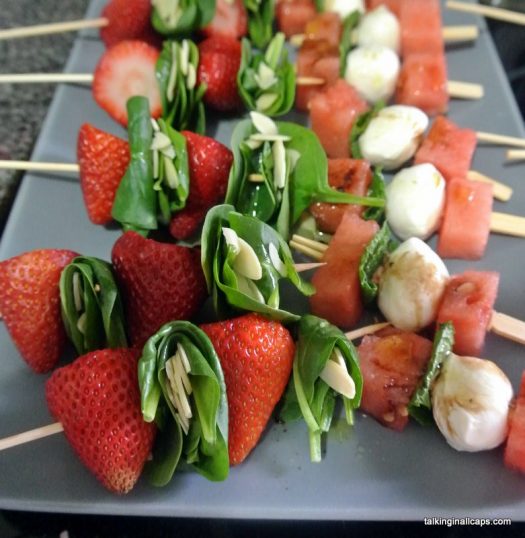
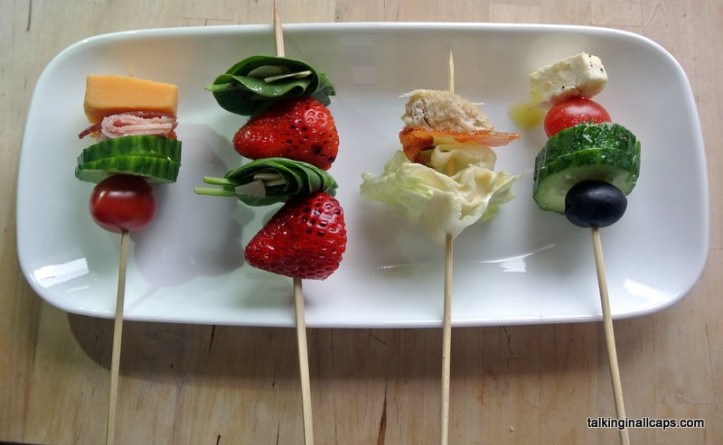
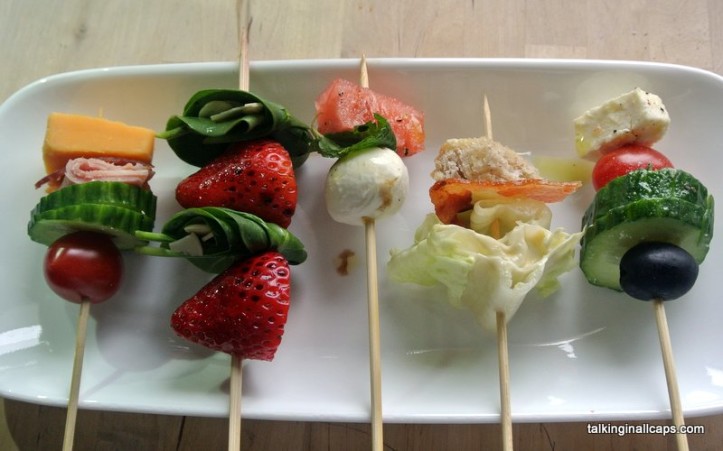
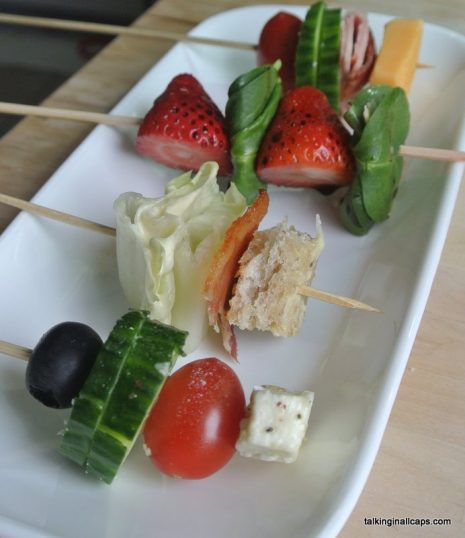
I first saw the idea of a salad on a stick in the Sweet Potatoes Chronicles Cookbook, How to Feed a Family. They used it as a cute lunch idea for kids. I thought the idea sounded potentially very cute (although maybe not so awesome in practice). I wanted to try out the idea as a party appetizer. I put together 5 different kinds and brought them to my book club. They went over really well and were definitely adorable. I did learn a few things about how to best make a salad on a stick. I also have 6 ‘recipes’ below. The watermelon one was the clear winner but they were all pretty good.

Salad on a Stick

Tips for Making Salad on a Stick

  • Use short skewers. Toothpicks are too small. If you can’t find short skewers, thread the salad near the tip). Long skewers make it really hard to transport.
  • Only slide the ingredients along the skewer as much as you absolutely have to.
  • Put something that will stick at the base (eg cheddar cheese, cherry tomato).
  • Ideally, put the dressing on on a different plate from the one you plan to serve on. It’ll help with any potential pooling.
  • Make 1 or 2 different kinds. Making multiple kinds just complicates your life.
  • Feta falls apart and is really hard to skewer.

08-DSC_4979

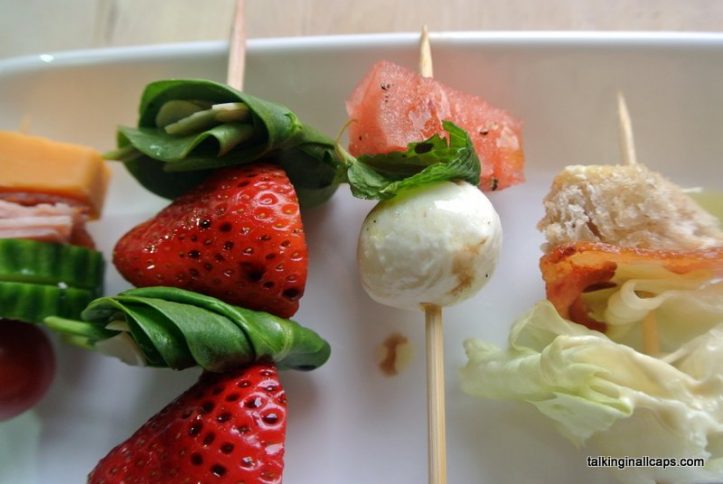
Watermelon Salad on a Stick

  • 2 Watermelon cubes
  • 1 mint leaf
  • 1 bocconcini ball (fresh mozzarella)
  • drizzle of honey
  • drizzling of balsamic vinegar (balsamic glaze works even better – I found it here at costco).

Salad on a Stick

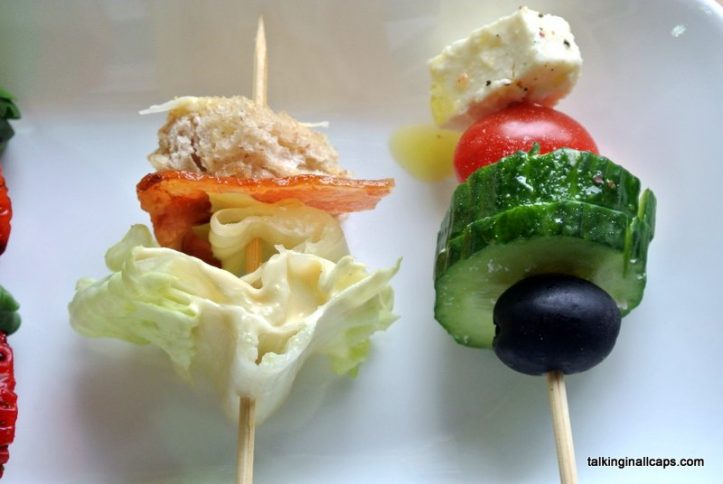
Caesar Salad on a Stick

  • Romaine Lettuce
  • Bacon
  • Croutons (homemade is best because they are softer – cut up some pieces of artisan bread, coat in a little butter and bake)
  • Caesar dressing

Salad on a Stick

Greek Salad on a Stick

My pictures show a piece of feta but in my experience it tends to crumble no matter how careful I tried to be. Instead, I recommend using a piece of bell pepper and putting feta in the dressing instead.

  • cherry tomatoes
  • slices of cucumber
  • olives
  • bell pepper chunks
  • drizzle feta or greek dressing  (or mix up olive oil, red wine vinegar, feta cheese, salt and pepper).

Salad on a Stick

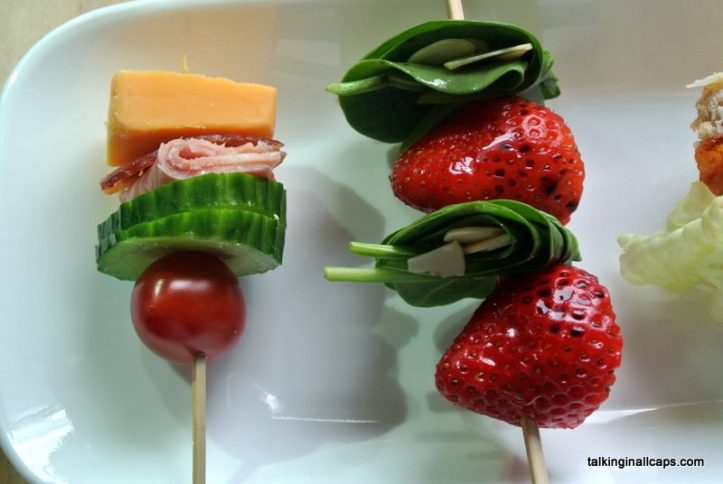
Strawberry Spinach Salad on a Stick

  • spinach leaves
  • strawberries
  • almond spices
  • drizzle of balsamic vinegar
  • drizzle of olive oil

Salad on a Stick

Chef Salad on a Stick

  • cheddar
  • slices of ham
  • bacon
  • cherry tomato
  • slices of cucumber

Salad on a Stick

Caprese Salad on a Stick

I didn’t actually make this. But I really wanted to. I couldn’t find basil. Why is it so hard to find basil in Calgary grocery stores?

  • cherry tomato
  • basil leaf
  • 1 bocconcini ball (fresh mozzarella)
  • drizzle with balsamic vinegar (balsamic glaze works perfectly)

Salad on a Stick


Did They Eat It?

There were only a couple salad on a sticks left at the end of the night. The Chef salad seemed to be a little less popular than the others and the Watermelon salad was (I think) the most popular. I would absolutely make them again, but I wouldn’t travel with them unless I could find shorter skewers.

Filed Under: 52 Salads, Appetizers, Food, Recipes

Chocolate Hazelnut Hummus

April 21, 2011 by danawyyc 1 Comment

Hazelnut butter is the only nut butter that I’ve tried that might give peanut butter a run for it’s money. It’s just so good. So it was almost inevitable that my hummus experimentation would end with Nutella inspired hazelnut hummus. It was way better than the peanut butter hummus. I ended up leaving it a little chunkier than I usually do with hummus which gave it a really nutty feel. I ate the whole batch with apples for dipping (over a few days of course!) And I didn’t even share. Yes, it is that good.

Hazelnut butter is not as easy to find as peanut butter or even almond butter. In the superstore by my house you can find it in the aisle with the organic food, soy, and gluten free products. Not in the peanut butter and jam aisle.

Chocolate Hazelnut Hummus

Print
Chocolate Hazelnut Hummus
 
Ingredients
  • 1 can (16 oz) Chickpeas ; rinsed and drained
  • 4 Tbsp Hazelnut butter or 2 TBSP hazelnut butter and 2 Tbsp peanut butter (I just used a big spoon – more if desired)
  • ½ teaspoon Sea salt
  • 1 teaspoon vanilla
  • ¼ cup cocoa powder
  • 4 Tbsp maple syrup (you can adjust this to taste (2-8 Tbsp)
  • ½- 3/4 cup Water (depending on the texture desired)
Instructions
  1. Drain and rinse the chickpeas.
  2. Add all the ingredients to the food processor (you can use a blender, but it’s not really not as effective. I have tried and don’t recommend it. I ended up buying a food processor so I could make hummus).
  3. Run the food processor until the hummus starts to appear to bounce up and down (this won’t take a really long time) . Alternatively just check it every 10 seconds or so. You’ll want to scrape off the sides of the food processor because I find some chickpeas tend to stick to the sides and then give it another quick blend. If you are finding it’s not as well mixed or creamy as you would like just add another ¼ cup of water.
  4. Serving Ideas With apple slices, as a sandwich spread, sauce on a dessert pizza, on crackers, with pita
3.2.2925


Filed Under: Appetizers, Cooking with kids, desserts and treats, Food, Recipes, Snacks

Chocolate Peanut Butter Hummus

March 26, 2011 by danawyyc 2 Comments

After making peanut butter hummus I started to wonder if you could make a sweet hummus dish instead of the traditional savory hummus. A peek around the internet proved that this was indeed possible so I decided to give it a try. Now some of the sites I visited suggested that this could be an actual dessert. I’m still not sold on that. What I made would not really be good as an ice cream topping for instance, and if I were to add enough sugar and fat to make it that way, I’d rather just go for broke and use caramel sauce.

Instead I would suggest using it as a Nutella alternative. Or as a way to try to get your kids to try beans. Sort of a gate way food for beans.  Overall, it wasn’t bad, people who tried it generally liked it, but I don’t think I’m going to have to make a new batch every week.

I’ve give a wide range for the maple syrup because it’s so easy to adjust to taste as you can just add more in and pulse the food processor for a few more seconds. We found that the cocoa came out more with less maple syrup, but it is definitely sweeter with more.

Print
Chocolate Peanut Butter Hummus
 
Ingredients
  • 1 can (16 oz) Chickpeas ; rinsed and drained
  • 4 Tbsp Peanut Butter (I just used a big spoon – more if desired)
  • ½ teaspoon Sea salt
  • 1 teaspoon vanilla
  • ¼ cup cocoa powder
  • 2-8 Tbsp maple syrup
  • ¼ cup Water (more if needed)
Instructions
  1. Drain and rinse the chickpeas
  2. Add all the ingredients to the food processor (you can use a blender, but it’s not really not as effective. I have tried and don’t recommend it. I ended up buying a food processor so I could make hummus).
  3. Run the food processor until the hummus starts to appear to bounce up and down (this won’t take a really long time) . Alternatively just check it every 10 seconds or so. You’ll want to scrape off the sides of the food processor because I find some chickpeas tend to stick to the sides and then give it another quick blend. If you are finding it’s not as well mixed or creamy as you would like just add another ¼ cup of water.
3.2.2925

image
imageimage

Cooking with the Kids
The kids can:

  • Measure and pour the ingredients
  • Rinse the chickpeas and put them in the food processor
  • Run the food processor (with supervision)

Serving Ideas With apple slices, as a sandwich spread, sauce on a dessert pizza, on crackers, with pita

Filed Under: Appetizers, Cooking with kids, Food, Recipes, Snacks

Peanut Butter Hummus

March 18, 2011 by danawyyc Leave a Comment

Print
Peanut Butter Hummus
 
Ingredients
  • ¼ teaspoon Garlic powder
  • ¼ cup Lemon juice
  • ¼ cup Water (more if needed)
  • 1 can (16 oz) Chickpeas ; rinsed and drained
  • 4 Tbsp Peanut Butter (I just used a big spoon)
  • 1 teaspoon Sea salt
Instructions
  1. Drain and rinse the chickpeas.
  2. Add all the ingredients to the food processor (you can use a blender, but it’s not really  not as effective. I have tried and don’t recommend it. I ended up buying a food processor so I could make hummus).
  3. Run the food processor until the hummus starts to appear to bounce up and down (this won’t take a really long time) . Alternatively just check it every 10 seconds or so. You’ll want to scrape off the sides of the food processor because I find some chickpeas tend to stick to the sides and then give it another quick blend. If you are finding it’s not as well mixed or creamy as you would like just add another ¼ cup of water.
3.2.2925

It’s funny how much how something is presented can change your attitude towards it. I’ve seen recipes for hummus that suggested you could substitute tahini with peanut butter on multiple occasions and I always thought that was kind of lame. Okay if you lived somewhere that you really couldn’t find any tahini, fine but otherwise?
Then one day my mom sent me a recipe for peanut butter hummus. Peanut butter hummus? Brilliant! Now I realize that this is actually the same thing that I previously thought was lame, but somehow now it sounds interesting and different instead of a cop out.
It’s pretty good too. The peanut butter taste isn’t overpowering but if your kid is a little adverse to hummus, this may be enough to win them over.
image
image
Cooking with the Kids
The kids can:

  • Measure and pour the ingredients
  • Rinse the chickpeas and put them in the food processor
  • Run the food processor (with supervision)

image
Per 1/8 of the hummus: Calories – 81, Carbs – 7g, Fat – 5g, Protein 4, Fibre – 2

Filed Under: Appetizers, Cooking with kids, Food, Recipes, Snacks, Vegan, Vegetarian

My Favorite Basic Hummus Recipe

March 11, 2011 by danawyyc Leave a Comment

I’m going to try out a few different hummus variations in the next couple of weeks, so I thought I’d first share my go-to hummus recipe. There’s about a million different hummus recipes out there but I do really love this one. I prefer the powdered garlic to fresh garlic as it gives it a more mellow flavor. I also strongly recommend making it a day ahead. The flavors have a chance to mix and the bitterness of the tahini (which I am a little sensitive to) is gone after a night in the fridge.

image

Print
My Favorite Basic Hummus Recipe
Recipe type: Dip
 
Ingredients
  • ¼ teaspoon Garlic powder
  • ¼ cup Lemon juice
  • ¼ cup Water (more if needed)
  • 1 can (16 oz) Chickpeas ; rinsed and drained
  • ½ cup Tahini
  • 1 teaspoon Sea salt
Instructions
  1. Drain and rinse the chickpeas.
  2. Add all the ingredients to the food processor (you can use a blender, but it’s not really not as effective. I have tried and don’t recommend it. I ended up buying a food processor so I could make hummus).
  3. Run the food processor until the hummus starts to appear to bounce up and down (this won’t take a really long time) . Alternatively just check it every 10 seconds or so. You’ll want to scrape off the sides of the food processor because I find some chickpeas tend to stick to the sides and then give it another quick blend. If you are finding it’s not as well mixed or creamy as you would like just add another ¼ cup of water.
3.2.2925

My favorite basic hummus recipe

I find this makes quite a lot of hummus so I usually freeze half. It freezes really well.


Filed Under: Appetizers, Food, Recipes, Snacks, Vegan, Vegetarian

Hard Boiled/Devilled Eggs

February 1, 2011 by danawyyc 1 Comment

I used to be able to cook a hard boiled egg properly. Then one day I couldn’t. I’m not sure what happened. I was using the same recipe I have used since I was 12.

Whatever the reason, after much frustration I finally figured out how to prevent them from being a disgusting ooey mess. The key was just turning up the heat a little when it was simmering.

How to Make Perfect Hard Boiled Eggs

1. Fill a pot with cold water to just cover the eggs. Bring to a boil. If you manage to remember that you are cooking and notice when they first start to boil you can avoid getting that grey skunge around the yolk by turning the heat down right away (make sure it is just above low).
2. Simmer for 10 minutes with the lid on and then run cold water over the eggs. Its best to peel them while they are still a little warm and if you roll them in your hands before you start to peel, it’s even easier to get the peel off nicely.

Since we’re talking about Hard Boiled Eggs I might as well share my Devilled Egg Recipe too. My family loves them. I’m pretty sure if I showed up to a family function without them I would be asked how long it was going to take me to go pick up the eggs that I obviously forgot at home.

Devilled Eggs - talkinginallcaps.com

Print
Devilled Eggs
Recipe type: Appetizer
 
Ingredients
  • Devilled Eggs
  • 12 Hard Boiled Eggs, peeled and cut in half lengthwise
  • ½ cup mayonnaise
  • 2 tsp mustard
  • 2 tsp vinegar
  • paprika
Instructions
  1. Scoop the yolk out of each egg and put into a bowl. Mash up with a fork.
  2. Add the mayo, mustard and vinegar and mix well.
  3. Put a big scoop of the egg mixture into each egg half and sprinkle with paprika.
3.2.1290


In case you were wondering, no I do not own a deviled egg tray. I own four. Seriously. I typically have to bring 3 or 4 full trays to a family party – they are that good.

Filed Under: Appetizers, Food, Recipes, Vegetarian

Primary Sidebar

About Me

I'm an experiential playground expert and mom to three young kids. I live with my husband in Calgary, Alberta, Canada. When I'm not looking after people, I'm reading all the YA fiction I can get my hands on and am attempting to learn photography. My laundry-folding suffers due to more interesting pursuits.

You can also find me over at:
12 Great Salads to Take to a Potluck or Feed a Big Group - talkinginallcaps.com

11 Great Salads to Take to a Potluck or Feed a Big Group

Sriracha tomato soup - easy meals - talkinginallcaps.com

12 Easy Meals That are Great for One or Two (or more!)

Asian Lentil and Mango Salad 3

Salad #49 – Asian Lentil and Mango Salad

Kale, Quinoa and Black Bean Salad

Salad #42 – Kale, Quinoa and Black Bean Salad

Disneyland Photography Tips - 11 Tips for Getting Great Photos Your Family Will Treasure

Disneyland Photography Tips – 11 Tips for Getting Great Photos of Your Disneyland Vacation

11 Tips for Taking a Toddler and a Preschooler to Disneyland

Categories

Archives

Footer

Copyright © 2025 · Foodie Pro Theme by Shay Bocks · Built on the Genesis Framework · Powered by WordPress