Google+ talkinginallcaps@gmail.com
  • Skip to primary navigation
  • Skip to main content
  • Skip to primary sidebar
  • Skip to footer

Talking in ALL CAPS

  • Food
    • 52 Salads Recipe Index
    • 52 Soups Recipe Index
  • Photography
  • Travel
    • Travel
    • US National Parks
    • Washington DC
    • Disneyland
  • Thoughts
    • Thoughts
    • Motherhood
    • Parenting
  • Calgary
  • About Me

danawyyc

These are a few of my favorite bloggers – Christmas cash giveaway

November 22, 2013 by danawyyc 8 Comments

christmas giveaway

Christmas is coming up (I’m sure this is probably a surprise to most of you who had no idea) so a few of my blogger friends decided it would be fun to host a giveaway for what I think is the best thing you can have going into the holiday season – cash.

I’d also like to introduce you to a few of my favorite bloggers who are helping me have a chance to win cash to buy some of your favorite things.

These Are a Few of My Favorite Bloggers


1. Erin from –Working Mother Chronicles

Erin writes about the challenges of being a working mom and current events from a mom’s perspective. She is insightful and thought provoking.


2. Sarah from – Doing All the Things

Sarah’s blog title could not be more apt. Following along with her blog will probably make you feel tired, but it might also inspire you to do some of the things too.


3. Katie from – Best Birthdays

Katie writes all about kid’s birthday parties in Calgary. She’s also pretty funny. If you’ve hosted a birthday party that you are proud of you can send it her way and she’ll feature you on her blog.

4. Merry from – Merry About Town

Merry writes about interesting things in Calgary, travel, food and more. Her family friendly recipes frequently show up on my table.


5. Sheri from – This Bird’s Day

Sheri’s blog is a great resource for finding deals, new products, tips and contests/giveaways available to Canadian residents. You never have to dig through the small print to see if Canadian’s are eligible. She also writes about her family and life in Edmonton, Alberta.


6. Leslie from – Ruff Ruminations

Leslie writes about her life in Calgary with her husband, young son and two big dogs. She’s also the mastermind behind Hippo Hug, an innovative line of weighted blankets.


7. Samantha from – Peek Thru Our Window

Samantha writes a personal blog about her life in and around Calgary.


8. Kyla from – Mommy’s Weird

Kyla is hilarious and sometimes verges on inappropriate.

9. Maija from Maija’s Mommy Moments

Maija is a working mom of 3 +1. She is beautiful and glamorous (although she would probably beg to differ, that is how I see it sitting here in my yoga pants) but absolutely down to earth. She is thoughtful, fun and is another one of my go to people for great family recipes. Her recipe for the easiest meatloaf ever, really is easy and has become one of my family’s favorites.

10. Erin Dunderdale from MrsBrits

Erin’s is a new blogger whose skill with the crochet hook makes me think I should learn.  She’s one of the most big-hearted people I know. She describes herself as a big city girl living in a small town.

$110 CAD Christmas Cash Giveaway

Filed Under: giveaway

Photos with Santa: Learning from other people’s mistakes

November 19, 2013 by danawyyc 11 Comments

Photos with Santa: Learning from other people's mistakes

Even though my oldest is only 4, I have quite a bit of experience taking small kids to see Santa. Partly for my blog post where I talk about what it’s like to take photos with Santa at different  malls in Calgary and partly because I think it is just plain fun. My friends and family have kindly supplied me with some photos to round out my own to help you get better photos with Santa this year.

1. Prepare Your Kids Ahead of Time

Read your kids stories about Santa, show them movies with Santa (if you can find one with their favorite character, even better) and show your kids pictures of them or other family members with Santa to familiarize them.
566336_10151312554677040_337526886_n

Unless the photos looked like this

Unless the photos looked like this.

It can also be worthwhile to seek out a Santa that is more natural looking and inline with their expectations.

603961_372686899487334_671224799_n

If you wouldn’t sit on that lap, why would you put your child on it?

Screenshot 2013-11-18 at 3.30.27 PM

This skinny Santa is not going over well

2. Dress for the Occasion

Even if you’re going to get a free photo, consider what your kids are wearing.

131559_112148458855831_5035859_o

Cute shirt, but not for this photo

IMG_0080

This may be going a little too far

S S

At the very least take off your kids coats!

You may also want to consider what you’re wearing that day… just in case.

image_1354210759337049

If you look closely, you can see Santa at the back

3. Use a Partner

Especially if you are taking the photos yourself, bring someone with you so they can help you position and distract the kids to help keep them from freaking out.

Crying with Santa

Freaking out

4. Try Backing In

If you have a really little kid, try holding them facing you and backing them into Santa, keeping their attention on you. Then back away and quickly take the picture.

gordie with santa0001[2]

Sometimes this works

Lola- Eff you Santa! 2011

Sometimes not so much

5. Time it Right

Arrive a bit early so your kids can see Santa from a distance before it’s their turn. Make sure they are not tired or hungry. Bring a snack just in case. Weekday mornings and evenings are usually quieter time to visit. Whatever you do, don’t go when your child would normally be napping.

Screenshot 2013-11-06 at 3.14.37 PM

Not a good time

6. Give Them Some Moral Support

Having a friend, sibling or even a favorite toy may be all your kid needs to feel comfortable and stay focused.

396652_10151165250754639_428035946_n

Worked like a charm

7. Be Flexible

You may be able to get a better picture by not trying to force a smile.

gordie and santa 20100001[2]

That’s a pretty cute pout

You may also want to consider letting your kids stand beside Santa instead of on his lap.

53308_10150347928425173_5766155_o

Santa may be holding him back, but they are all in the picture.

8. Make use of Some Photography Tips

If you are taking the photo yourself, try setting the white balance to match the lighting (florescent or incandescent bulbs). Or you can adjust that on your computer afterwards.

baby Dana and santa

Was 1982 really this yellow?

If the room isn’t very bright, bump up the ISO and hold the camera steady (close to your body, try to kneel or set the camera on something to use as a makeshift tripod). Also double check that your camera is focusing on your child instead of the background.

photo (53)

That tree looks great!

santafamily

Holding the camera horizontal can also be a good strategy

Position yourself so you can see your child’s face even if they are not looking directly at you.

newspaper santa

Candid shots often show your child at their best.

Don’t forget to take multiple pictures.

blink santa

So this isn’t the only photo you go home with.

263686_10152291199235562_575835129_n

He looks cutely unsure in this picture instead of full on bawling

9. Try Again

If your child is hesitant to see Santa the first time, don’t be afraid to go back (again) later in the day or on another day all together.

DSC_0827

The first try

DSC_0837

Again after lunch.

10. If All Else Fails…

You can always take a family photo near Santa instead. Most malls have a Christmas display that would make a great backdrop.

704653_10152311427910173_1395289379_o

This is the best ‘Santa’ photo this family has taken.

tree at home

Or you can even use your tree at home

Or you could just take a picture of Santa!

just santa

Even if Santa looks a little confused.

11. Laugh it Off

Sometimes, even if you end up with a picture that wasn’t what you wanted, it can still end up being a treasured part of your family history.

67889_10152287758050397_782823760_n

That year’s Christmas card

As funny as some of these photos are, I hope this post helps your family get great photos with Santa this year. And if your pictures don’t go as planned you can always send them to me for next year’s post.

Have a Merry Christmas!


What are your tips for taking better photos with Santa?

If you have a not-so-good photo with Santa you’d like to share, you can e-mail it to talkinginallcaps@gmail.com.

Are you from Calgary? Check out my website about the best indoor and outdoor places to take your kids –> http://www.calgaryplaygroundreview.com

All Photos used with permission

Filed Under: photography Tagged With: humor, Santa

No Sew Baby Blankie Tutorial and Weighted Blanket Giveaway

November 9, 2013 by danawyyc 1 Comment

Having the right blanket can can do more than simply keep you warm – it can absolutely improve your sleep. Along these lines I have two things to bring to you today. One is a super easy baby blankie tutorial and the other is a giveaway for a Weighted Blanket.

No Sew Fleece Baby Blankie Tutorial

These blankies are cuddly, soft and easy to care for. I like to make them fairly small so they are easy for little ones to carry around and you can make a few of them fairly cheaply. A lovey like a baby blanket or stuffed animal can help babies and toddlers sleep better. It provides a sleep cue, and can provide comfort both at bedtime and other times when they are sad, sick or feeling insecure.

If you want to try to use a blankie as a lovey for your baby, keep it with them while sleeping, and stick it between you and your baby while you are nursing or giving them a bottle. This will help them associate it when feeling calm and secure. I recommend making two or three blankies if you are planning to use them this way with your own kids and rotating them frequently so they develop similar wear patterns. This make it easier for you to wash the blankies and prevent bedtime panic if you can’t find the blankie you baby loves (because you’ll just be able to pull a different one out of the closet).

No Sew Baby Blankie

You Will Need:

  1. Sharp sissors
  2. 2 colors or patterns of Fleece fabric (any kind is fine, cuddly fleece is especially fluffy but wears down with multiple washes and lots of love)

Directions:

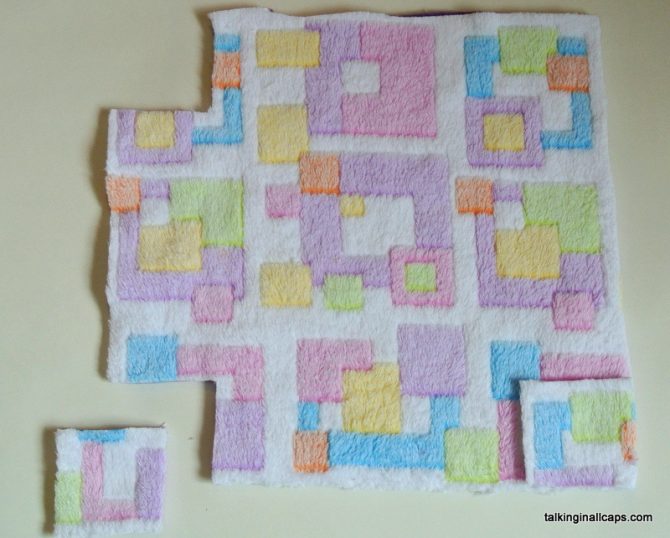
1. Lay your two pieces of fabric on top of each other and cut your fabric in a square or rectangle. You’ll need to cut it larger than you want the final blankie to be.

2. Cut a square of fabric from each corner – cut through both pieces of fabric at once. These do not have to be perfectly even. I usually just eyeball a square and use the first square I cut out as a template for the other corners. For a larger blankie or a full sized blanket, you’ll want these to be about 2 inches x 2 inches. If you are making a small blankie, you can make these smaller about 1/5 of the size of the blankie.

No Sew Baby Blankie

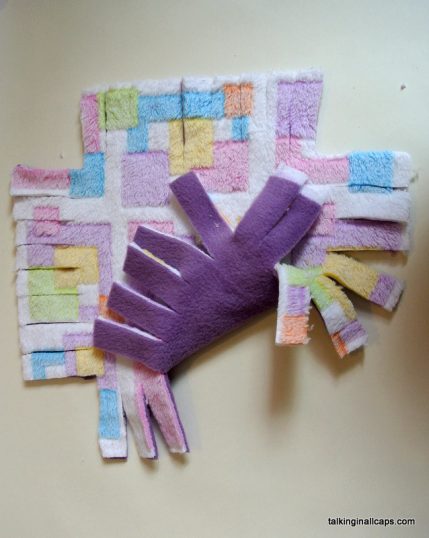
3. Cut strips in the fabric along each edge the same length as the squares. These do not have to be perfectly even in length or width. For most blankies you will want to cut strips about half an inch wide. If you are making a small blankie, you’ll need to make them thinner. In general, you want the strips to be about a third of the width of the squares.

No Sew Baby Blankie

4. Tie the top and bottom fabric in each strip in a double knot. The fabric may have shifted while it was being cut. This may make the top and bottom strips not match up perfectly. It’s okay if they are not even in length as long as you are still able to tie the knot.

No Sew Baby Blankie

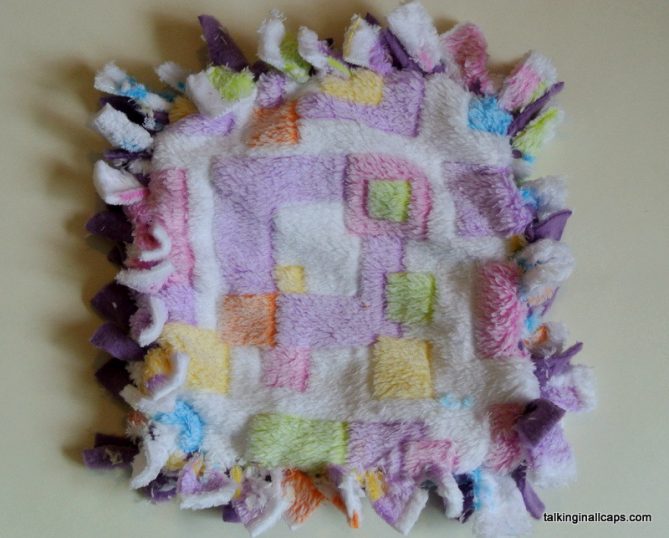
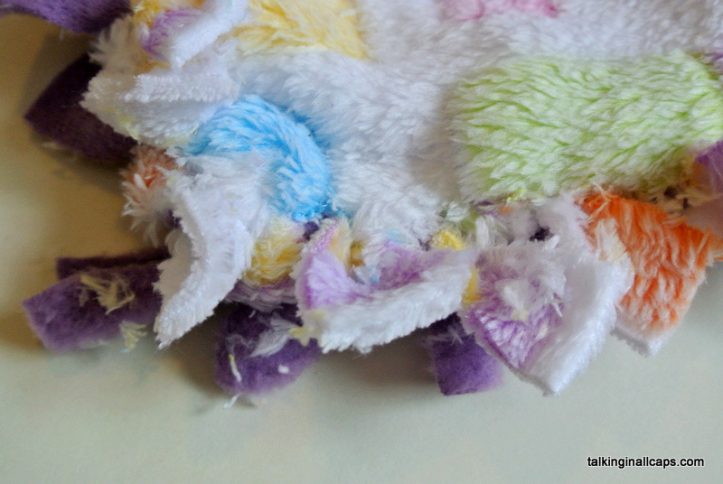
5. Throw the blankie in the wash. If you are using a fluffy fleece this will get rid of all the loose fibres. Washing it will also flip the knots so that the bottom fabric shows up on the top of the knot making it really pretty.No Sew Baby Blankie

No Sew Baby Blankie

The knots may come untied in the wash or with use but you can just re-knot them.

I love giving these blankies as gifts. Even if they aren’t used as a lovey, they are great to keep warm in carseats and carriers or they can be used for pretend play with dollies or other toys. They have a nice homemade touch but are so easy even I can make them.

Weighted Blanket Giveaway

In similar vein, a friend of mine makes Weighted Blankets right here in Calgary, Alberta. Hippo Hug weighted blankets can improve all kinds of sleep difficulties by providing deep pressure. They can also benefit people with sensory problems, anxiety or restlessness. You can find out  more about weighted blankets at hippohug.ca. Hippo Hug is celebrating their 2nd Anniversary by giving away a weighted blanket.

485316_510529122341174_861217876_n

Enter below to win a weighted blanket or animal – a value of up to $265! The contest closes on December 9th. Good luck!

Hippo Hug Weighted Blanket Giveaway

Filed Under: Craft, Kid Activities, Tutorial

Salad #33 – Mexican Street Corn Inspired Quinoa and Corn Salad

September 22, 2013 by danawyyc 6 Comments

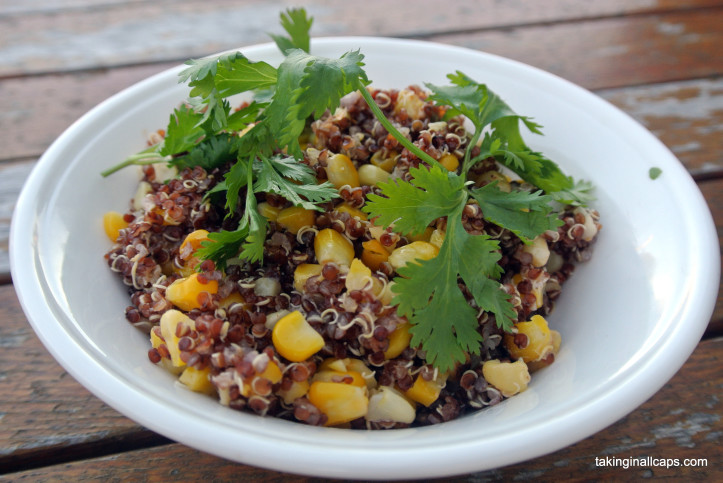
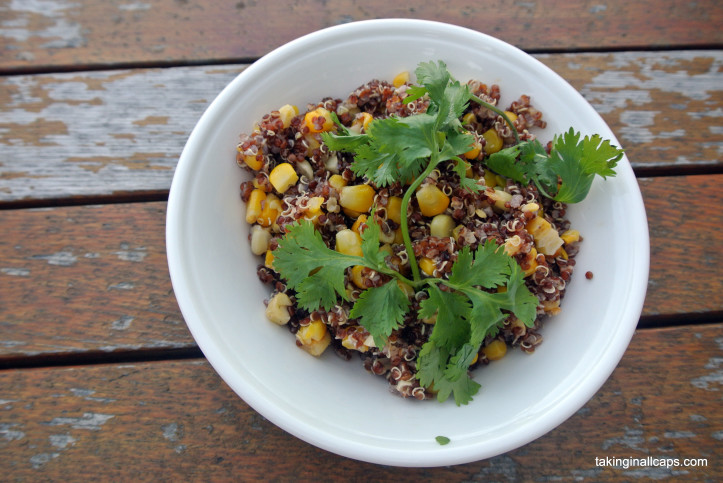
Mexican Street Corn Inspired Quinoa and Corn Salad

I’ve been seeing recipes for Mexican street corn popping up on pinterest lately. I ended up with some extra roasted corn after making this salad so I decided to try to make a salad version. This recipe probably does not have much in common with the kind of corn you might actually get on the street, but it is super good nonetheless. Even my relatives who are not keen on spicy food liked this recipe although I did try to keep it pretty mild.

Mexican Street Corn Inspired Quinoa and Corn Salad Recipe

(inspired by this Mexican Street Corn recipe and this Mexican Corn and Quinoa salad recipe)

Print
Salad #33 - Mexican Street Corn Inspired Quinoa and Corn Salad
 
Ingredients
  • 2 cups cooked red or white quinoa
  • 2  ears grilled corn cut from the cob (or you could just use frozen kernel corn or roast the corn in the oven)
  • squirt of sriracha sauce (or other hot sauce)
  • 1 lime, juiced (optional)
  • 1-2 tablespoons feta cheese, crumbled (optional)
  • chili powder to taste
  • 1 TBSP of mayo
  • drizzle of olive oil
  • salt and pepper to taste
  • 1 handful cilantro, chopped (optional)
Instructions
  1. Mix up the mayo, olive oil, chili powder, salt and pepper (and lime if using).
  2. Mix the dressing with the quinoa, corn, a squirt of sriracha sauce (and the feta and cilantro if using).
  3. Adjust the heat as you like with the chili powder and sriracha sauce.
  4. Best served at room temperature, but generally just delicious.
3.2.2925

Mexican Street Corn Inspired Quinoa and Corn Salad

Did They Eat It?

Stephen: Really good. Mint might be good in it too.

Richard – I liked that and I’m not into spicy foods. Enough to liven it up.

Deb – Nice side dish. Healthy and spicy.

Nicky (1.5 years) – liked the salad and didn’t mind the heat.

Gordie (4.5 years) – refused to try it. Was upset that the corn looked burnt so wouldn’t try that either.

Dana – This was even better than I had expected.

Mexican Street Corn Inspired Quinoa and Corn Salad


Filed Under: 52 Salads, Food, Recipes, Salads, Side Dishes, Vegetarian Tagged With: corn, quinoa, slider

Salad #31 – Kale Salad with Grilled Corn

September 15, 2013 by danawyyc 1 Comment

I’ve always been a little intimidated to buy corn still in the husk. At the grocery store by my house, there is a huge garbage can by the corn for the discarded leaves that collect by people examining the corn. I had no idea what I should be looking for but it seemed pretty clear that I should be looking for something. I decided this summer to just bite the bullet and buy some corn. When I brought the corn home and started husking it became pretty obvious what I should have been looking for. To spare you from feeling like an idiot at the grocery store, here are some tips for picking corn at the grocery store.

How to Pick Corn at the Grocery Store

  1. Peel back the husk so you can see the kernels. You may end up losing a few leaves so you can do this which is fine. Some stores will even have a bin for you to discard them.
  2. Look at the kernels on the end. You want them to look plump and firm.
  3. Discard them if the kernels on the end are squashed and broken, or there is a lot of small undeveloped kernels. A few undeveloped kernels on the end is fine, but a lot of them means that the corn was picked before it was fully ripe. You’ll also want to look out for discoloration or mold indicating that the corn is past it’s prime.

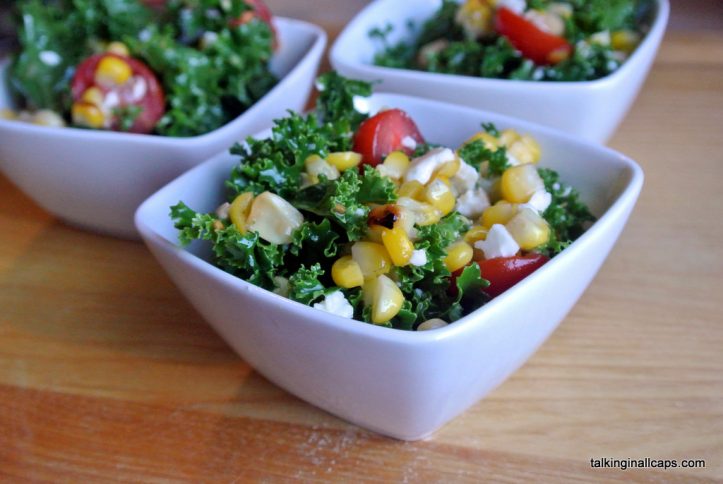
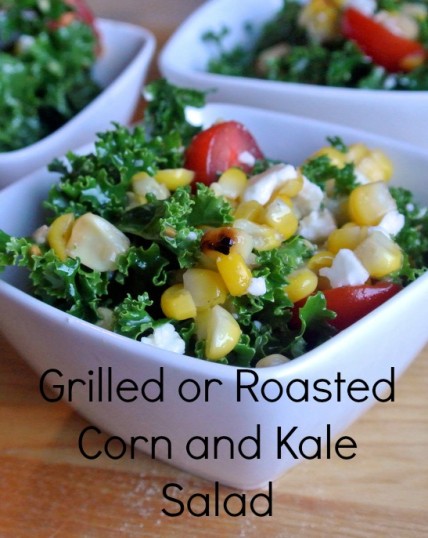
Kale Salad with Grilled Corn


I decided to grill the corn for this salad. I’d never tried that before and wasn’t sure it was going to be worth the effort. It turned out to be amazing – I highly recommend giving it a try. Alternatively, you can roast it in the oven which will give similar results. Steaming, boiling or microwaving the corn will still make a great salad but it may lose a little of the awesomeness.

Kale Salad with Grilled Corn Recipe

(adapted from http://www.heatherchristo.com/)

Print
Salad #31 - Kale Salad with Grilled Corn
 
Ingredients
  • Salad Ingredients
  • 1 bunch kale, stems removed, cut into small strips
  • 2 ears grilled corn cut off the cob (I used these instructions or baked in tin foil)
  • Feta cheese crumbled (optional)
  • 1 cup cherry tomatoes, sliced in half
  • Dressing Ingredients
  • 1 tablespoon grainy mustard
  • 2 teaspoons honey
  • 3 tablespoons olive oil
  • 3 tablespoons white or red wine vinegar
  • salt and black pepper
Instructions
  1. Mix vegetables a large bowl.
  2. Shake the dressing ingredients in a small container with a lid until well mixed. Or you can whisk them together in a medium sized bowl.
  3. Add the dressing to the vegetables a little at a time and mix until the salad is well covered.
  4. Serve and top with the feta cheese if desired.
3.2.2925

Kale Salad with Grilled Corn

Did They Eat it?

Stephen: The salad was good. The corn’s what kills it. [In a good way]

Anne: This is good! My new favorite salad.

Nicky (17 months): loved the corn and tomatoes.

Gordie (4 years old): Loved the corn before it went into the salad.

Dana: This is one of my favorite salads so far. It’s really very simple but it makes a big impact. I will make this salad again for sure.

Kale Salad with Grilled Corn


Filed Under: 52 Salads, Food, Recipes, Salads, Side Dishes, Vegetarian

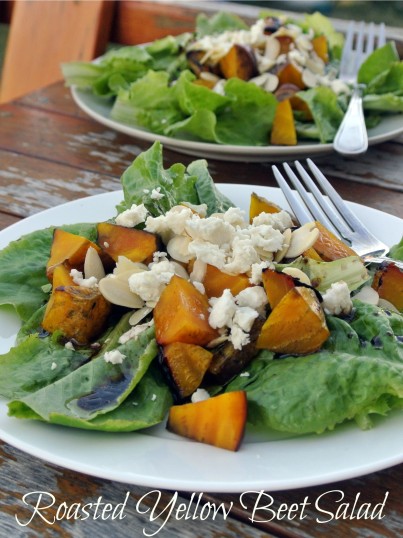
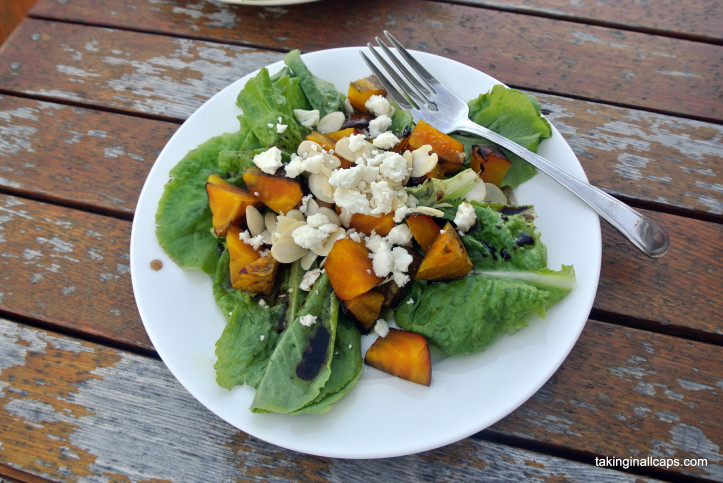
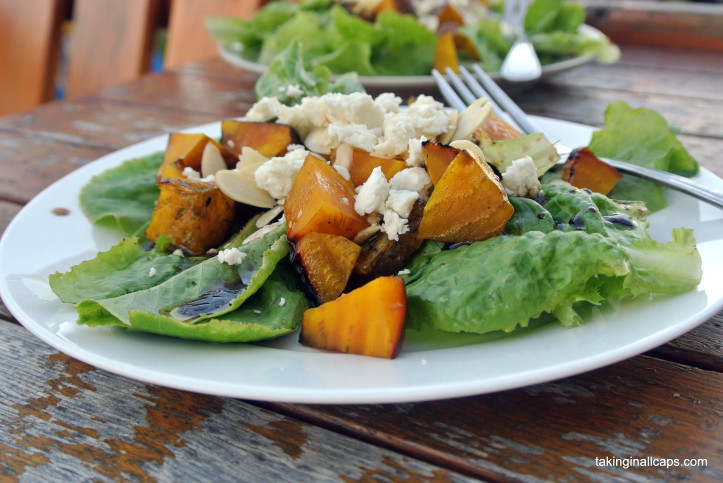
Salad #32 – Roasted Yellow Beet Salad with Feta

September 13, 2013 by danawyyc Leave a Comment

Roasted Yellow Beet Salad with Feta

We got a number of beets this year from our CSA (Community Supported Agriculture). The yellow beets are my favorite. They taste pretty much the same as the more common purple beets, but they are way less messy.  This is a pretty classic salad – it’s simple, but surprisingly delicious. 

Roasted Yellow Beet Salad with Feta Recipe

(Adapted from The Curvy Carrot’s Roasted Balsamic Beet Salad)

Print
Salad #32 - Roasted Yellow Beet Salad with Feta
 
Ingredients
  • Salad Ingredients
  • yellow beets (red or purple will also work just fine)
  • romaine lettuce (or other greens)
  • feta cheese, crumbled
  • sliced almonds
  • Dressing Ingredients
  • salt and pepper
  • 2 tablespoons extra-virgin olive oil
  • ⅓ cup balsamic vinegar
  • 1 tablespoon maple syrup
Instructions
  1. Roast (or you can grill instead) the beets until they are cooked through.
  2. Mix dressing ingredients together in a small bowl with a whisk or shake well in a container with a lid.
  3. Layer salad green, beets, feta and dressing on each plate.
3.2.2925

Roasted Yellow Beet Salad with Feta

Did They Eat It?

Stephen: Traditional but good.

Richard: Very nice. I enjoyed it.

Deb: I don’t like roasted beets or goat cheese.

Gordie: Refused to try any of the salad or the beets.

Nicky: Refused to try it.

Dana: I really loved this salad. After the beets were cooked it was easy to throw together too.

Roasted Yellow Beet Salad with Feta

Filed Under: 52 Salads, Food, Recipes, Salads, Vegetarian

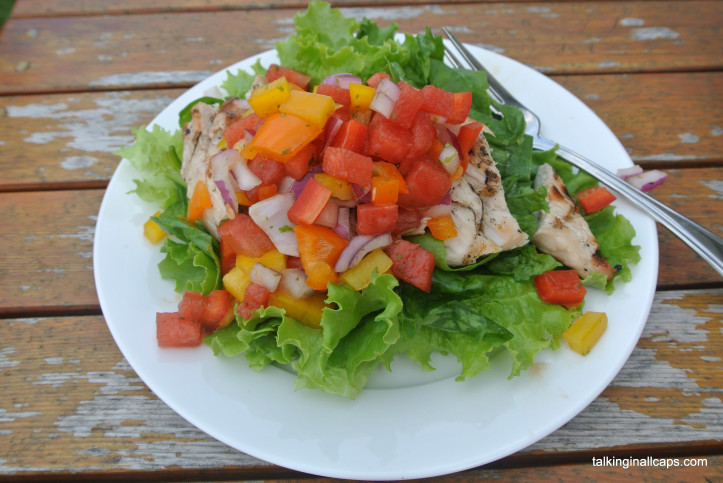
Salad #30 – Watermelon Salsa over Grilled Chicken and Greens

September 12, 2013 by danawyyc Leave a Comment


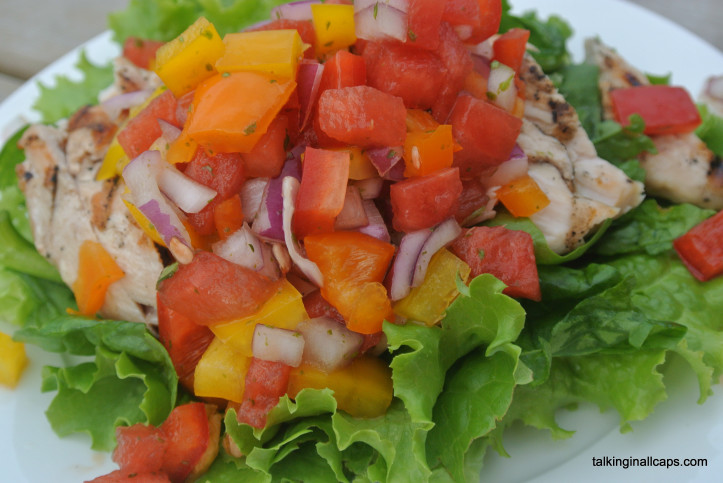
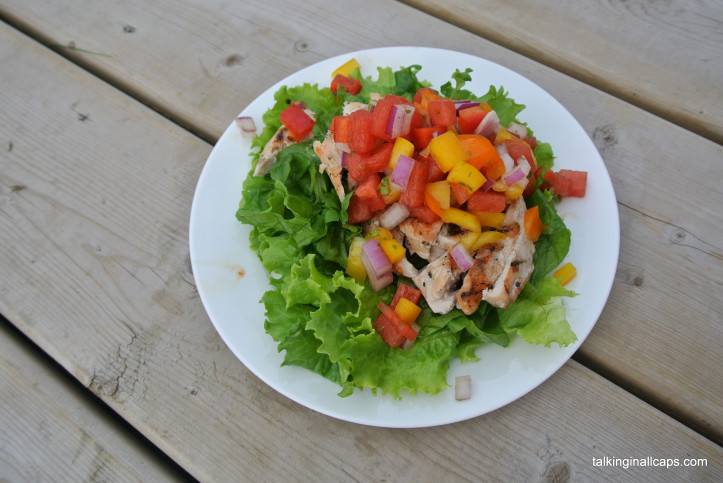
When my husband asked me to make a watermelon salad, I made this watermelon salad with red peppers and strawberries. I loved it but apparently it was not the watermelon salad that my husband had in mind. It turns out what he wanted was a grilled chicken salad with watermelon salsa. The salsa turned out really well but the salad needed either a glaze on the chicken or extra dressing over the salad. Maybe a spicy thai dressing or even a balsamic vinegar dressing. Or you can always just put the salsa in a bowl and eat it with chips and call that your salad. Which I absolutely did with the leftovers.

Watermelon Salsa over Grilled Chicken and Greens

Watermelon Salsa

(adapted from the Pioneer Woman’s Watermelon Pico De Gallo Recipe)

Print
Salad #30 - Watermelon Salsa over Grilled Chicken and Greens
 
Ingredients
  • ⅛-1/4 pf a watermelon, diced
  • 3 peppers, diced (I used red, yellow and orange)
  • ¼ red onion diced
  • bunch of cilantro chopped
  • juice of two limes
  • squirt of sriracha sauce
  • salt
Instructions
  1. If you are a big cilantro fan, you can just mix the ingredients together in a big bowl.
  2. If you are less certain about cilantro, start by mixing the watermelon, peppers and red onion in a large bowl.
  3. In a food processor (I used a magic bullet) mix together the cilantro, limes, sriracha sauce and salt. Blend well. This will take some of the bite out of the cilantro.
  4. Pour over the salsa and mix well.
  5. Serve over your bed of greens with grilled chicken (and hopefully some kind of dressing).
3.2.2925

Watermelon Salsa over Grilled Chicken and Greens

Did They Eat It?

Stephen: Really good.

Nicky (17 months): loved the peppers and watermelon

Gordie (4 years old): loved the watermelon as long as it wasn’t part of the salad.

Dana: I found it a little bit bland because I didn’t use any additional dressing and had grilled the chicken plain. I would make this again, but would definitely use some kind of dressing. The salsa itself was great.


Watermelon Salsa over Grilled Chicken and Greens

Filed Under: 52 Salads, Chicken, Easy Meals, Food, Recipes, Salads

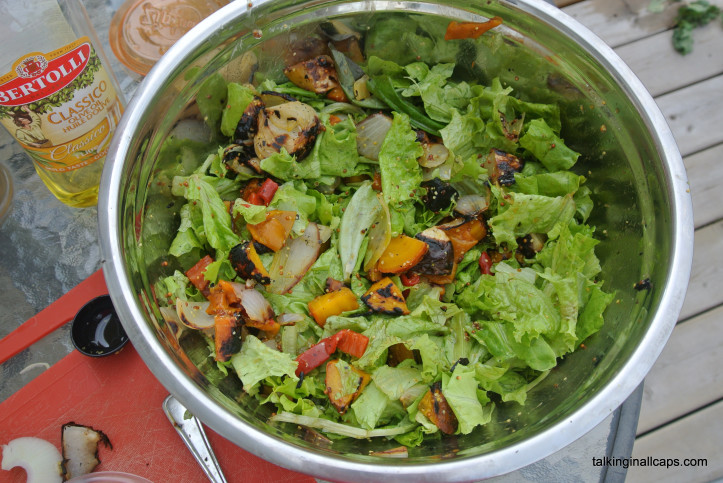
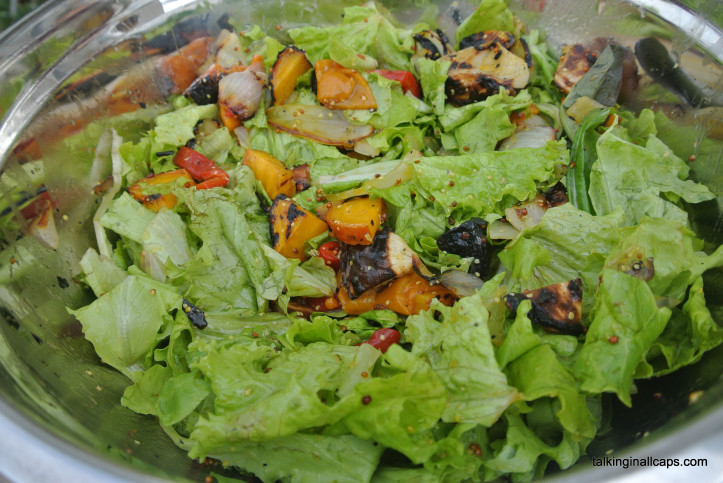
Salad #29 – Grilled Vegetable Salad with Greens and Mustard Dressing

September 7, 2013 by danawyyc 1 Comment

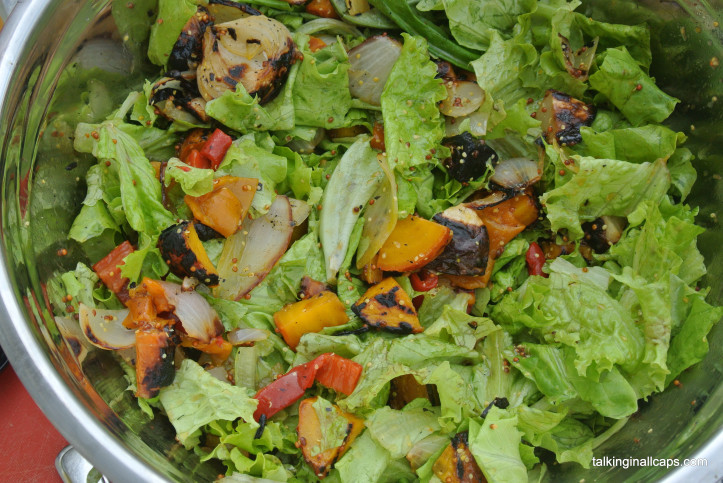
Grilled Vegetable Salad with Greens and Mustard Dressing
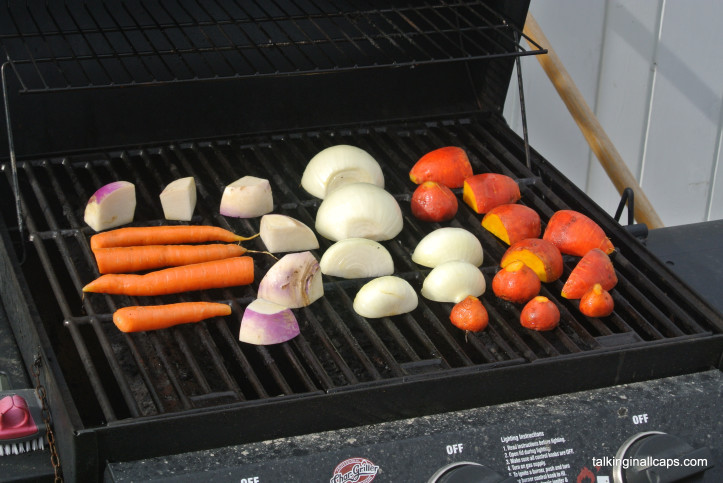
Summer is nearly over, but there is probably a few weeks of great grilling weather left. This salad is a perfect if it’s too hot to cook inside but you have some vegetables that you’d like to roast. If the weather is a bit cooler and the thought of turning on your oven doesn’t make you want to cry, the vegetables can also be roasted in the oven instead. Below, I’ve written down the vegetables that I used for my salad, but you could use any grilled vegetables you have on hand including zucchini or asparagus.

Grilled Vegetable Salad with Greens and Mustard Dressing

(Adapted from Cook With What You Have)

Print
Salad #29 - Grilled Vegetable Salad with Greens and Mustard Dressing
 
Ingredients
  •  2 medium onions
  • 1 turnip
  • 4 carrots
  • 6 small beets red and yellow
  • 2 large roasted red peppers (from a jar)
  • lettuce
  • parsley
  • 2-3 tablespoons whole grain mustard
  • 2 tablespoons olive oil
  • Zest of 1 lemon
  • Sea salt and freshly ground pepper
Instructions
  1. Chop Vegetables into large pieces and coat with olive oil.
  2. Mix the oil, lemon juice, mustard and salt and pepper in a small bowl and whisk until well mixed.
  3. Heat your grill to about 400F. I found this to be about medium low on my grill.
  4. Place your vegetables on your grill and cook until cooked through. Turning occassionally. If you are using more tender vegetables this may only take a few minutes, larger root vegetables may take up to 20 minutes.
  5. Take the vegetables off the grill and chop into bite sized pieces. If you are using fresh peppers instead of jarred, place the pepper in a plastic bag for a few minutes to make it easier to take off the skin.
  6. In a large bowl, combine the lettuce, roasted chopped vegetables and dressing.
  7. Serve and enjoy.
3.2.2925

Grilled Vegetable Salad with Greens and Mustard Dressing

Grilled Vegetable Salad with Greens and Mustard Dressing

Did they Eat It?

Bronwen – Neat touch with the roasted greens

Anne – really liked it. Surprise to have roasted vegetables in a salad

Grandma Mary – I really liked the one with the beets. Those beets were so good.

Richard – very good. It seemed like there was something with a bit of kick in it too.

John – I filled up on the roasted vegetable salad. Very good. Never had it before.

Dana – This salad was delicious. I would absolutely make this again. One of my favorites so far.

Grilled Vegetable Salad with Greens and Mustard Dressing


Filed Under: 52 Salads, Food, Recipes, Salads, Vegan, Vegetarian

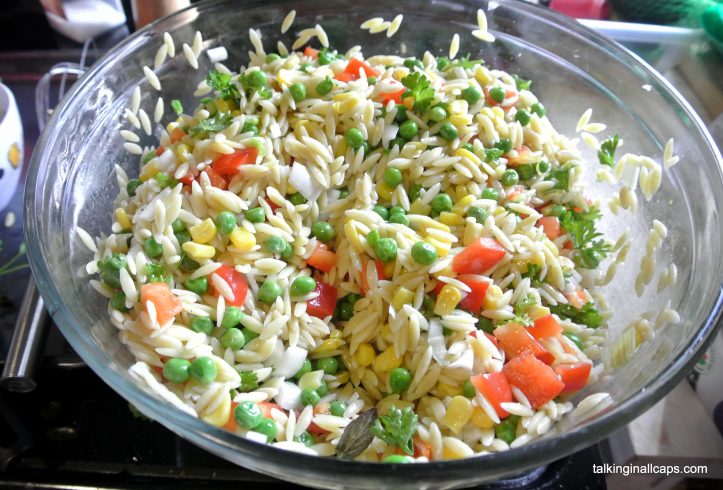
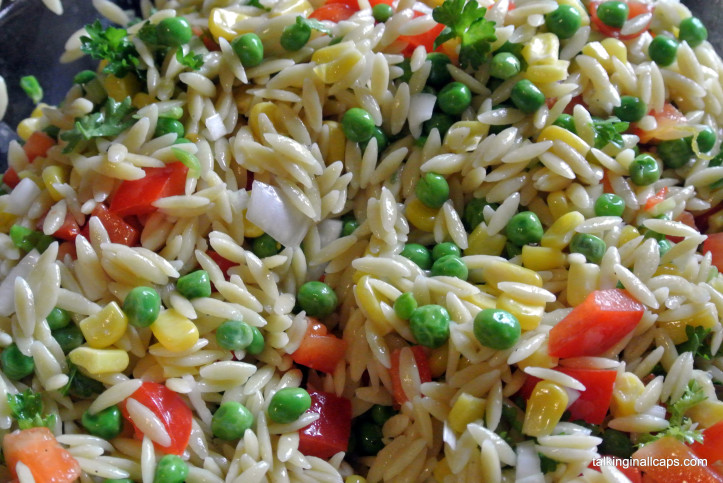
Salad #28 – Orzo Salad

September 6, 2013 by danawyyc Leave a Comment

My friend Erin recommended this salad to me, in her words she blogs about “recipes (that don’t kill my husband) and crocheting!” over at Mrs Brits. She raved about how good it was and after making it myself I would have to agree. I used frozen peas and frozen corn, but it would be great with garden peas, snow peas, snap peas or corn kernels cut from the cob.  The flavors are simple and will complement almost any meal. I love how it is so much lighter than your typical pasta salad.

Orzo Salad

Orzo Summer Vegetable Salad Recipe

(adapted from Healthy Alberta’s Orzo Summer Vegetable Recipe)

Print
Salad #28 - Orzo Salad
 
Ingredients
  • 2 cups orzo
  • 1 red pepper chopped
  • ½ cucumber or two mini cucumbers
  • 2 cups frozen corn
  • 2 cups frozen peas
  • 1-2 tomatoes, chopped
  • ½ cup red or spanish onion (finely chopped)
  • 1 lemon (zest and juice)
  • handful of parsley chopped (or mint or cilantro - I used parsley with a bit of mint which was quite nice)
  • Olive oil
  • salt and pepper
Instructions
  1. Cook the orzo according to the package instructions.
  2. Drain, mix with a little olive oil and let cool in a large bowl. If you are using frozen corn and peas, it doesn't have to get right down to room temperature.
  3. Mix the remaining ingredients with the orzo.
  4. Serve cold or at room temperature. Keeps well for a couple days.
3.2.2925

Orzo Salad

Did They Eat It?

Deb – nice and light compared to a lot of pasta salads

Grandma Mary – I liked it, but not as well as the one with the beets. [review to come]

Richard – very good.

Bronwen – Delicious. Perfect starch complement to the steak.

Nicky (17 months) – Liked the veggies from the salad but left the orzo alone.

Geoff (my special needs brother) – Loved it. Asked for more. Yay!

Anne – Really nice change for the starch.

Dana – This is a nice simple salad, but don’t underestimate it. It’s easy to put together and switch out the ingredients to whatever you have on hand. The orzo works really well – it didn’t get mushy even with a couple of days in the fridge. Perfect to make for a crowd.

Filed Under: 52 Salads, Food, Recipes, Salads, Side Dishes, Vegan, Vegetarian

Salad #27 – Potato Salad with Cilantro Lime Vinaigrette

August 15, 2013 by danawyyc Leave a Comment

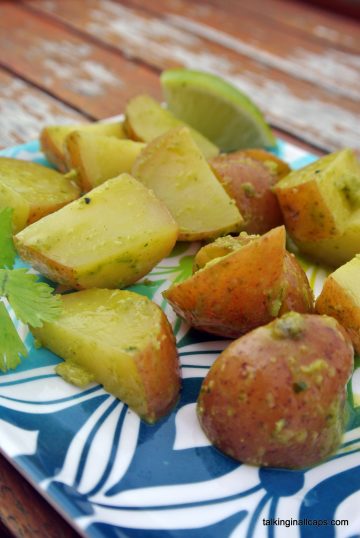
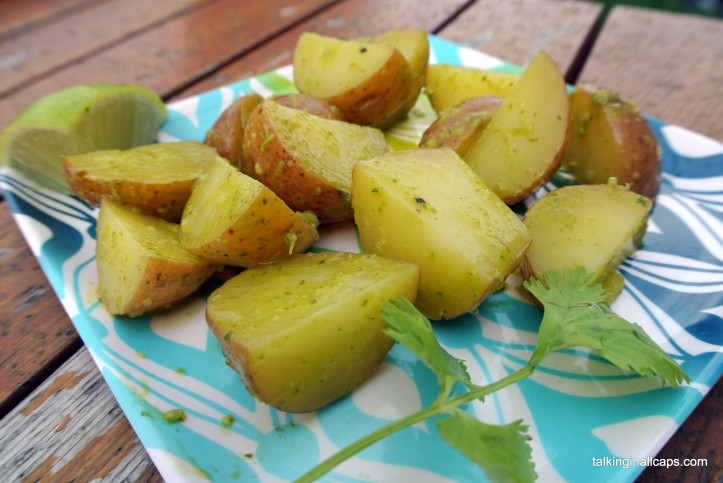
I’m going to be honest. I am not a fan of cilantro. I don’t hate it as much as I used to, but I still generally substitute parsley or something whenever a recipe calls for cilantro. I had heard that when cilantro is all minced up, it is more palatable (for people who don’t already like it) so I thought I would give it a try. Surprisingly, the dressing was really good. I even had a couple other cilantro skeptics try it and they liked it too.

Potato Salad with Cilantro Lime Vinaigrette

Potato Salad with Cilantro Lime Vinaigrette

Ingredients

  • Cilantro Lime Vinaigrette (recipe below) 
  • Potatoes cut into bite sized cubes.

Directions

  1. Boil potatoes until cooked through.
  2. Drain the potato water and lay the cooked potatoes out on a tea towel to dry. If you rinse the potatoes or put the dressing on before the potatoes dry it makes it hard for the dressing to stick. It will be less of an issue if you are serving it immediately.
  3. Put the potatoes in a large bowl and pour the dressing over the potatoes. Mix well.

Cilantro Lime Vinaigrette

(adapted from Cilantro Lime Vinaigrette)

Print
Salad #27 - Potato Salad with Cilantro Lime Vinaigrette
 
Ingredients
  • Juice of 1 lime
  • 3 Tbsp. Fresh Chopped Cilantro
  • 2 Tbsp. Apple Cider Vinegar
  • 3 Tbsp. Olive Oil
  • 1 garlic scape, or ½ Clove minced
  • Pinch of Sea Salt
Instructions
  1. All ingredients together in a blender or food processor. Blend until smooth.
3.2.2925

Potato Salad with Cilantro Lime Vinaigrette

Filed Under: 52 Salads, Food, Recipes, Salads, Side Dishes, Vegan, Vegetarian Tagged With: potatoes

« Previous Page
Next Page »

Primary Sidebar

About Me

I'm an experiential playground expert and mom to three young kids. I live with my husband in Calgary, Alberta, Canada. When I'm not looking after people, I'm reading all the YA fiction I can get my hands on and am attempting to learn photography. My laundry-folding suffers due to more interesting pursuits.

You can also find me over at:
12 Great Salads to Take to a Potluck or Feed a Big Group - talkinginallcaps.com

11 Great Salads to Take to a Potluck or Feed a Big Group

Sriracha tomato soup - easy meals - talkinginallcaps.com

12 Easy Meals That are Great for One or Two (or more!)

Asian Lentil and Mango Salad 3

Salad #49 – Asian Lentil and Mango Salad

Kale, Quinoa and Black Bean Salad

Salad #42 – Kale, Quinoa and Black Bean Salad

Disneyland Photography Tips - 11 Tips for Getting Great Photos Your Family Will Treasure

Disneyland Photography Tips – 11 Tips for Getting Great Photos of Your Disneyland Vacation

11 Tips for Taking a Toddler and a Preschooler to Disneyland

Categories

Archives

Footer

Copyright © 2025 · Foodie Pro Theme by Shay Bocks · Built on the Genesis Framework · Powered by WordPress